This post may contain affiliate links. If you buy something through one of these links, we may earn an affiliate commission - at no extra cost to you.
Hi, my name is Emily. I am a pie critic…who doesn’t know how to make pies.
Until now, that is!!!
My grandma was an amazing pie baker. Every holiday, special event, or just because, she made a pie.
Apple was my favorite, but I couldn’t pass up a good pumpkin pie. Or her lemon meringue pie, or her rhubarb pie in the spring. They were all flawless, every time. Even when she would exclaim that this crust wasn’t her best.
Grandma, it was always your best. To us, at least.
Unfortunately, I never did learn how to make pies from her. She never wrote anything down. And, we never had a dedicated time where she taught me. Or, anyone else in my family.
All I have is the memory of the taste of her pies, and a few visions of her rolling out the crust, and using her fingers to flick water onto it.
I have remained a tough critic, even 20 years later. And, I don’t even know how to make a pie myself – at least not well.
That changes NOW, my friends.
And, of course, I decide to start by learning how to make a gluten free pie crust first…rather than a regular pie crust. Which, is a little more challenging. But, the purpose of making pies is to share them with loved ones. And, my parents need to eat gluten free, so…. gluten free crust it is!!!!
Does this gluten free crust taste like my grandma’s? As close to it as I will probably get. My inner pie critic is pretty happy.
This gluten free crust is flaky, tender, and so buttery. And, you can’t detect that it’s gluten free at all.
I call that a win!!!
This gluten free pie crust is easy to make, and handle, if you are a seasoned pie baker – with a little practice, it’s easy to handle for beginners too. With a few added ingredients, and a gluten free flour blend, this gluten free pie crust remains as straight forward, and simple as a classic pie crust.
Gluten free pie crust is flaky, tender, buttery, and perfect for any pie filling you desire.
So, let me walk your through all that you need to know about making gluten free pie crust, so that you can impress your family and friends with your gluten free pie baking skills!!!
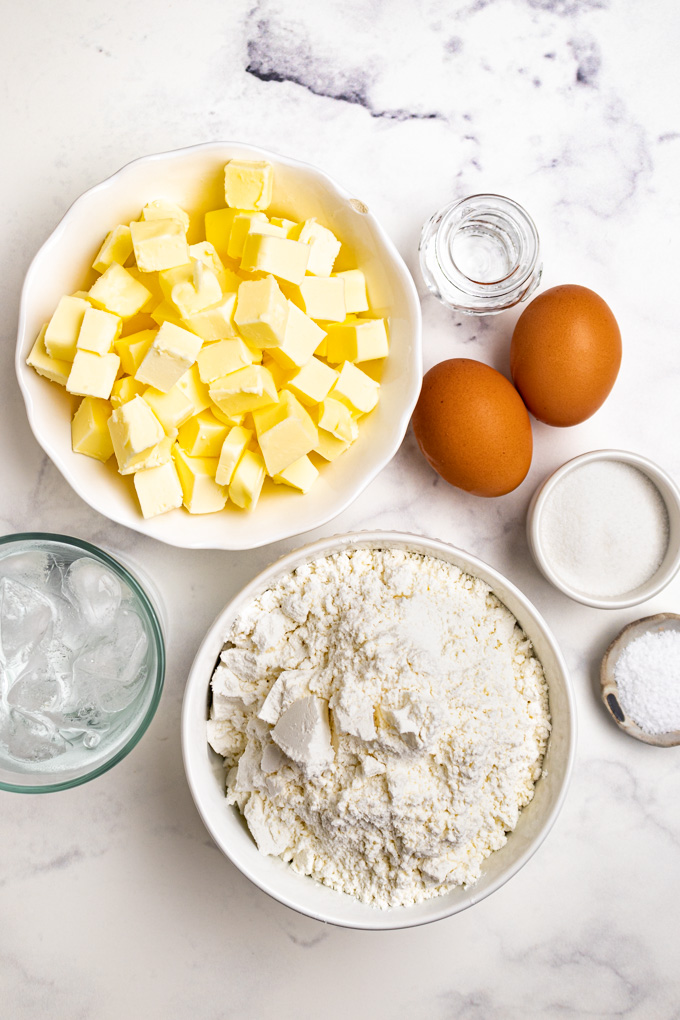
Ingredients for gluten free pie crust
As always, the measurements for the ingredients are listed in the recipe card below. But, let’s discuss the ingredients here.
- Butter – this is an all butter pie crust. Being from Wisconsin, I am a big fan of that buttery taste. Let me tell you, it is the way to go!!! We will talk more about butter later.
- Eggs – eggs aren’t normally in a regular pie crust. Due to the lack of gluten protein in gluten free flour, we need to add some of that structure back in – thank you eggs. They help hold the crust together. Trust me, they make all the difference so that you don’t have a crust that falls apart on you.
- White vinegar – this is the other unusual ingredient that we add into gluten free crust. For some reason gluten free crust can end up tough. Vinegar solves that problem by helping to tenderize it. You won’t taste the vinegar at all. But it does play a very important roll in texture.
- Cup4Cup multipurpose gluten free flour – This particular flour blend gave me the best results every time. Cup4Cup flour provides a crust that tastes just like regular gluten free crust. At this time, I do not recommend using any other flour blend for this recipe.
- Kosher salt – everything needs a little salt for flavor.
- Granulated sugar – the sugar adds just a hint of sweetness to the crust which compliments a sweet pie. It also helps with browning the crust. You can easily reduce the amount to 1 tablespoon, if making a savory pie.
- Ice water – pie crust loves to be kept cold. Ice water is essential when adding moisture to the dough.
Dusting flour for rolling out the dough
To reserve the cup4cup flour blend for using in the pie crust, I like to dust my work surface with a cheaper flours – both of which are ingredients that are already in cup4cup flour.
- White rice flour – the white rice flour provides texture and grip.
- Cornstarch – the cornstarch provide the right amount of fine, easy spreadable fluffiness.
Can you tell that this gluten free pie crust is gluten free?
No.
I had several people try this crust in a pumpkin pie, and no one commented that it tasted gluten free.
It tasted flaky, buttery, tender, and so delicious!!!
When working with the gluten free dough, it is pretty similar to working with regular pie dough, due to the good quality of the cup4cup flour blend, and the extra structure that the eggs provide.
However, if you’re new to making pie crust in general, then yes, making this pie crust will take a little practice. Once you get the hang of it, it’s as easy as a regular crust.
Will this gluten free pie crust work with any pie recipe?
Yes.
It should work well with any type of pie you want to make. As long as you follow my directions for making the pie crust, then follow the baking times for the pie recipe you are making – you should be golden.
Single crust pies. Double crust fruit pies. Custard pies.
And, even savory pies!!!
The sky is the limit!
Be sure to check out my easy pumpkin pie recipe, where I use this very pie crust!!!!
What kind of flour is best for making gluten free pie crust?
Cup4cup multipurpose flour is the gluten free flour blend that I recommend.
I did try another brand and didn’t have success with it.
If in the future I do have success with another gluten free flour blend, I will update this blog post.
But as of right now, I recommend using cup4cup flour.
Where to by Cup4Cup gluten free flour blend?
At least in my area, I found that Amazon has the best price for cup4cup flour. (affiliate link)
Do I need to use eggs in this gluten free pie crust recipe?
Yes.
The eggs provide structure that is lacking without the gluten. I tested this recipe without eggs, and it was very difficult to work with.
Do I need to use vinegar in gluten free crust?
Yes.
The vinegar helps to tenderize the crust and make it flaky. You won’t taste the vinegar at all. It’s only there to help with texture.
Without it you will have a very tough crust.
What type of butter should I use for my gluten free pie crust?
There are two main options for choosing the type of butter to use when making your pie crust. First, let’s define the different types of butter.
Different types of butter:
- European butter – has a higher fat content. Meaning it usually has more flavor, in my opinion.
- American butter – has less fat content than European butter. Which isn’t bad, it just tastes a little less buttery.
What type of butter is better for a pie crust?
This can depend on your flavor preference, and your skill level.
- European butter – will result in a more flavorful, more buttery pie crust due to the higher fat content. However, because of the higher fat content it does melt easier making it harder to work with.
- American butter – will still taste good, but it will have a slightly less buttery flavor. However, due to the lower fat content, it doesn’t melt as quickly as European butter does, making it easier to work with for beginners.
Conclusion: if you are a beginner pie maker, I suggest using American butter because it won’t get soft on you as fast. If you are a seasoned pie maker, feel free to use the European butter for better flavor.
I personally found that the American butter was easier to work with, but I did like the taste of the European butter better. With more practice, I hope to make the European butter my go to butter for making pie crust.
Can I make this gluten free pie crust in advance?
Yes!!!
You can make the crust a day in advance and store it in your fridge.
Or, you can make the crust days, weeks, or months, in advance and store it in your freezer. When you’re ready to work with the dough, pop it in the fridge the night before to thaw out.
How long will this gluten free pie crust last in the freezer?
At least 6 months.
Just make sure it’s tightly wrapped in plastic wrap, and sealed inside a resealable bag to keep it fresh.
That’s the great thing about pie crust. If you are making a single crust pie, you can store half of the dough in the freezer for future pies.
I currently have 2 pie crusts waiting in my freezer for Thanksgiving!
When in doubt, keep everything cold!!!
Pie crust works best when it is well chilled.
You are going to chill the butter, eggs, and vinegar before even starting. You’re gong to use ice water to hydrate the dough. And, I even like to pop my rolling pin into the freezer for 20 minutes before I start.
Plus, you’re going to chill the dough at several stages to keep everything cold.
Why is it important to keep ingredients, and the pie crust itself cold?
Pie crust is a form of pastry. The basics of a pastry is that when the hot oven hits the cold butter, the cold butter creates steam and thus creates a flaky, tender pastry. This is the ultimate pie crust, IMO! Without the cold butter, the butter will just melt into the dough and it will not create that steam.
Another reason to keep your crust cold, is it makes it easier to roll out, and it prevents sticking.
Melting butter = bad!
So, if at any point your crust, or butter, feels like it’s getting warm or melty on you, pop everything into the fridge or freezer!!! When in doubt, keep it cold!
Special equipment I used, and recommend for making gluten free pie crust
- Cup4Cup multipurpose flour – As stated before, this flour blend provided me with the most consistent results. Plus, it tasted the most like a regular pie crust.
- Kitchen scale – with any baking, but especially with finicky baking, such as pie crust, measuring out the exact ingredients is key. The only way to do that is with a kitchen scale. I weighed my butter, and my flour.
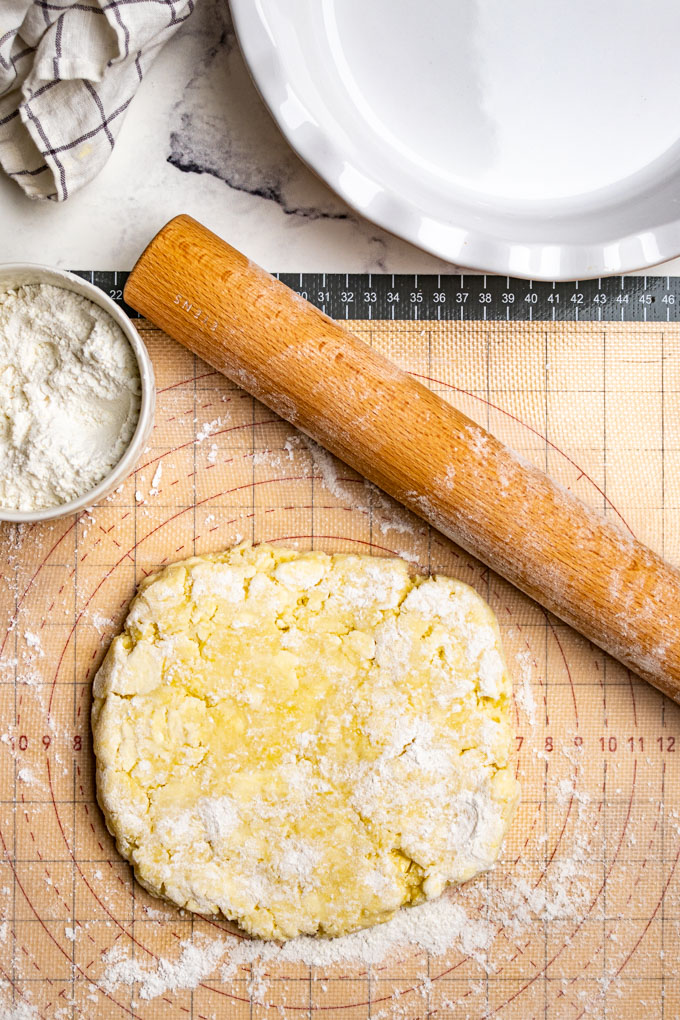
- Pastry mat – When testing this recipe I tried plastic wrap, just the granite countertop in my kitchen, and parchment paper, and everything stuck, or was hard to maneuver. The entire process got easier when I got a pastry mat. It really helped to prevent the dough from sticking, and it provided a round measurement to guide me in rolling out my crust.
- French rolling pin – of course, rolling pins are a personal preference. However, I found that I prefer a French rolling pin, it’s so easy to work with.
- 9 inch ceramic pie plate – Ceramic is great because it conducts heat well and helps with the browning of the pie crust.
- Plastic wrap and re-sealable baggies – This is essential for keeping the dough from drying out when its chilling. The baggies are especially needed if you’re freezing your dough.
- Aluminum foil – This is especially useful if you are par baking, or blind baking a single crust for a single crust pie.
- Dried rice (or other pie weights) – If you’re making a single crust pie, you will need to par, or blind bake it. This requires a pie weights. You can purchase ceramic pie weights, or use dried beans, or dried rice (my preference). Make sure you line your crust with foil so you can remove the pie weights. And, make sure you have enough pie weights to fill the pie plate to the top edge of the pie.
- Pastry brush – If your pie recipe requires you to give the crust an egg wash at any point, a pastry brush is hepful.
Troubleshooting your gluten free pie crust
Pie crust is one of those things that takes a bit of practice to get it right. It’s less about the recipe itself, and more about the feel of the dough. It’s almost a sense. That’s why people who have been making pies their entire lives are so good at it.
Never fear, you can still make a really good pie, you just need to know what you’re looking for. So, let’s talk about common mistakes that can happen with making pie crust, and how to fix them.
- My dough is too crumbly/falling apart – this is often a sign that your dough is not hydrated enough. I was having this problem with my first few attempts, and it was frustrating. If your dough isn’t sticking together, then you need more ice water. Be careful not to add too much, sometimes all you need is to flick a few droplets on with your fingers. Remember, if this process makes the dough too soft, wrap it up and pop it back into the freezer or fridge for a few minutes.
- My dough is too wet/sticky – this is the opposite problem as the one above. If this happens, it means you over hydrated your dough. To fix this, flour your surface extra generously when rolling out the dough. This will help incorporate more flour. The dough shouldn’t stick to your hands when you touch it. If it gets too warm, then pop it back into the freezer, or fridge before you work with it again.
- Everything is sticking to my rolling pin/my work surface – Most likely your dough has gotten too warm. Slide the dough onto a rimless baking sheet, and pop it into the freezer/fridge until it feels more firm. You can also pop your rolling pin in the freezer to get it nice and cold. Another reason things could be sticking is because you’re not flowering your work surface, and top of your dough enough. It’s also helpful to keep the pie dough moving as you roll it out. Rotate it after every roll and flip it every other roll. I also found things stuck a lot less when I used a pastry mat, so give a pastry mat a try.
- My pie crust slumped during par/blind baking – If you are making single crust recipe, you will need to par bake (partially bake the crust), or blind bake the crust (fully bake it) before you fill it with the filling. If your pie crust slumped/shrank a lot whit it was baking, it can be because you didn’t use enough pie weights. Pie weights are essential when par/blind baking to help maintain the shape of the crust. You want to add foil to the crust, fill it with pie weights up to the very top of the crust. You can purchase ceramic pie weights, or use dried beans, or dried rice to weigh your crust down. I use dried rice.
- My crust got too dark on the edges during baking – If the crust around the edges looks like it’s starting to get too dark, you can put foil around the edges to prevent it from getting any darker. It’s always a good idea to keep on eye on your pie, and not leave your pie alone too long while it’s baking, so you can smell any burning and catch it before it gets too bad.
- The butter is melting out of my curst during baking – Some of the butter melting out of the crust during baking is normal, this is why I recommend lining a baking sheet with foil, and placing the baking sheet underneath the pie plate to catch any drips. However, if your crust has lost a crazy amount of butter, this can happen for 3 reasons: 1) the crust wasn’t chilled enough before going into the oven. I freeze mine for 20 minutes before baking. 2) Your oven wasn’t hot enough when the crust went in. Start your oven off at 425 degrees Fahrenheit. 3). The butter wasn’t coated well in the flour. The flour acts as a barrier against the heat, for the butter. When you are making your crust, make sure to toss the butter in the flour periodically.
- My crust is brittle and dry, after it’s baked – This is the result of too much of the butter melting out of your crust. See above for how to prevent this.
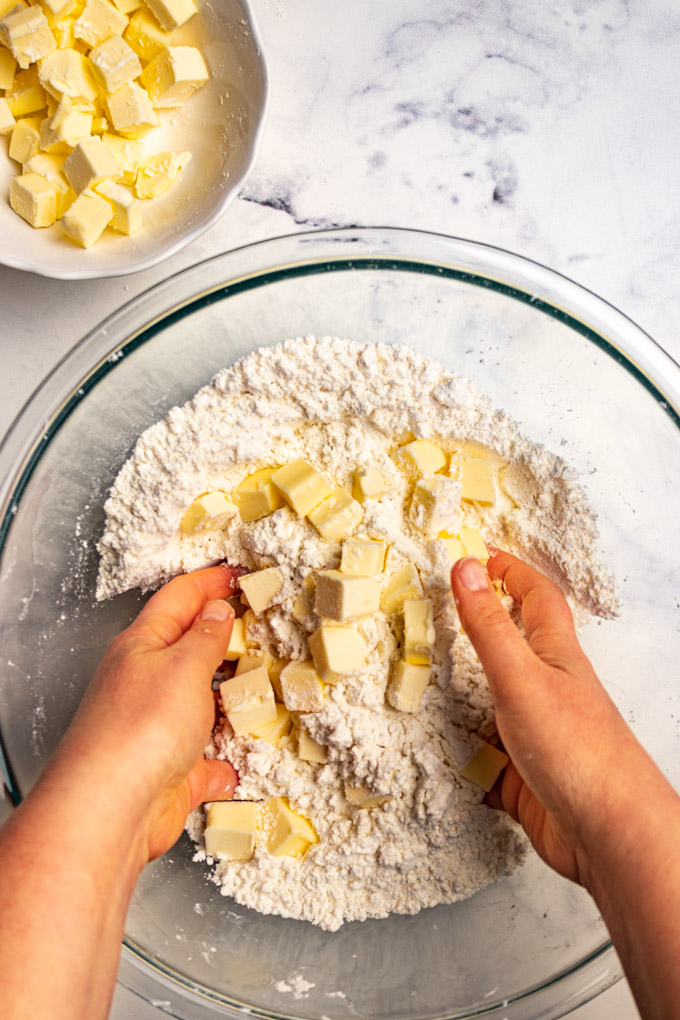
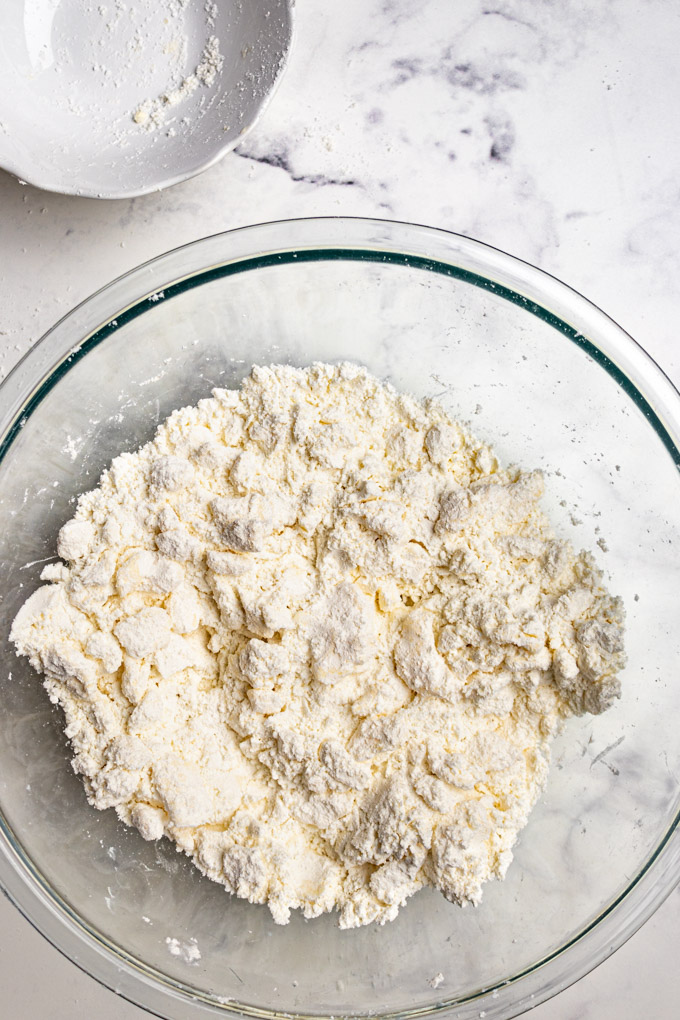
- My crust isn’t flaky once baked – Flaky crust = large chunks of butter. You want your butter to mostly be the size of walnut halves. Some smaller pieces, like the size of chickpeas are okay too. I found the best method to ensure the butter is in larger chunks, is to use my hands to work the butter into the dough. You want to see streaks of butter once the dough has been rolled out. See the directions in the recipe card to learn more about how to work the butter into the dough.
Resources I recommend to help you learn how work with pie crust (especially if you’re a beginner)
- How to make Pie dough and Crust | Bake it up a notch with Erin McDowell – this video was incredibly helpful for me to learn how to handle my dough, and how to troubleshoot it. My method is based off her method. Plus, it helps to watch how it’s done. She doesn’t mention making a gluten free crust, but the method still applies here.
- Art of the Pie by Kate McDermott – This book is like the bible of pies. Not only are there so many great pie recipes in here, Kate, has detailed directions for how to make pie dough. She even includes gluten free recipes. I highly recommend getting your hands on this book if you are wanting to learn more about pie.
A word of encouragement
If you are new to pie making, this section is for you.
Don’t be discouraged if your first pie isn’t that great.
Pie making, especially gluten free pie making, is an art. It is something that requires practice, and persistence. It requires that feel, and instinct, that only comes from making lots of pies.
I myself am still somewhat a beginner at making pie. But, I wanted to learn how to do it to hopefully help you too. I started testing this recipe in late August. I made about 1 pie a week for 6 weeks straight to finally arrive at a place where I felt confident enough to share this recipe with you. I am telling you this, so you know how long it took me to feel comfortable at making pie crust.
If I can do it, you can do it too!
Keep trying. Keep practicing, my friends. And it will get easier, I promise.
It will be so worth it. There is nothing more satisfying than sharing a homemade pie with loved ones.
I hope you find this recipe one that you can come back to and use for any pie you want to make. I myself am excited to continue to learn as I bake more pies.
You’ve got this!!!
Reasons you will love this gluten free pie crust
- It’s flaky,
- tender,
- and buttery.
- It doesn’t taste gluten free at all.
- It’s easy to work with.
- It can be frozen for 6 months!
- It works great with any kind of pie.
Recipes that go with this pie crust
More desserts for you to try
- yogurt cream cheese frosting
- lemon cheesecake cookie cups with berries
- maple pecan pie bars (without corn syrup)
- the best key lime pie (gluten free)
- apple pie parfaits (no bake)
- instant pot cheesecake with cherry topping
- gluten free lemon bars
Did you make this recipe?
Let me know how it went. Be sure to leave a comment down below, along with a star rating. I love hearing from you.
Print
Flaky Gluten Free Pie Crust (All-Butter)
- Prep Time: 20 minutes
- Freeze Time: 35
- Total Time: 55 minutes
- Yield: 2 pie crusts 1x
- Category: baking, deserts, pastry
- Method: rolling, freezing
- Cuisine: gluten free, vegetarian
- Diet: Gluten Free
Description
This gluten free pie crust tastes just like a regular pie crust. It’s flaky, tender, buttery, and works for any type of pie. Be sure to check out my easy pumpkin pie recipe.
Ingredients
- 16 tablespoons (245 grams, 8.8 ounces), butter, cut into 1 inch cubes – (See notes)
- 2 large eggs, whisked
- 1 tablespoon + 1/2 teaspoon white vinegar (see notes)
- 3 cups (390 grams) cup4cup multipurpose gluten free flour (see notes)
- 1.5 teaspoon kosher salt
- 3 tablespoons + 1/4 teaspoon granulated sugar (sugar helps with browning. Reduce to 1 tablespoon for a savory crust)
- 4 to 8 tablespoons ice water (or, as needed)
Dusting flour for rolling out the dough (see notes)
- 2 tablespoons white rice flour
- 2 tablespoons cornstarch
Instructions
- Prepare: Cut the butter into 1 inch cubes. I suggest measuring your butter by weight, I found some sticks of butter weren’t the exact measurement they claimed on the wrapper. Place the cubed butter into the freezer; freeze for 10 to 15 minutes – depending on how warm your kitchen is. The butter should be very firm, but not completely solid. Crack the eggs into a small bowl, whisk with the fork, and place the bowl in your fridge. Measure out the vinegar and place it into the fridge as well. Also fill a glass, or measuring cup with water, and add ice. The goal is to get everything as cold as possible.
- Mix together the dry ingredients: Add the flour to a large mixing bowl. Again, for a more accurate measure, I suggest weighing the flour. Add the sugar and salt, mix everything together, and set aside. If your kitchen is especially warm, you can even place the bowl with the flour in it into the fridge for 10 minutes.
- Cut the butter into the dough: Add about half of the cold butter cubes to the flour, toss them so they are coated in the flour. At this point you can either use you hands (my preference), a pastry cutter, or two butter knives to cut the butter into the dough. Using my hands is my preferred method because you can really feel what’s going on with the dough, but it is tricky, because the heat from your hands can warm up the dough faster. With any method, the goal is to break the butter down to the size of walnut halves, or chickpeas, and smoosh it into the flour. I like to have a combination of both sizes of butter pieces (the larger the pieces of butter, the flakier your dough will be). Make sure the butter is always coated in the flour. Once you have broken down all the butter, add the remaining second half of butter – toss it in the flour, and start breaking it into smaller pieces, until you have worked through all of the butter. NOTE: if at any point the butter starts to feel too warm, then pop the bowl into the fridge, or freezer for a few minutes.
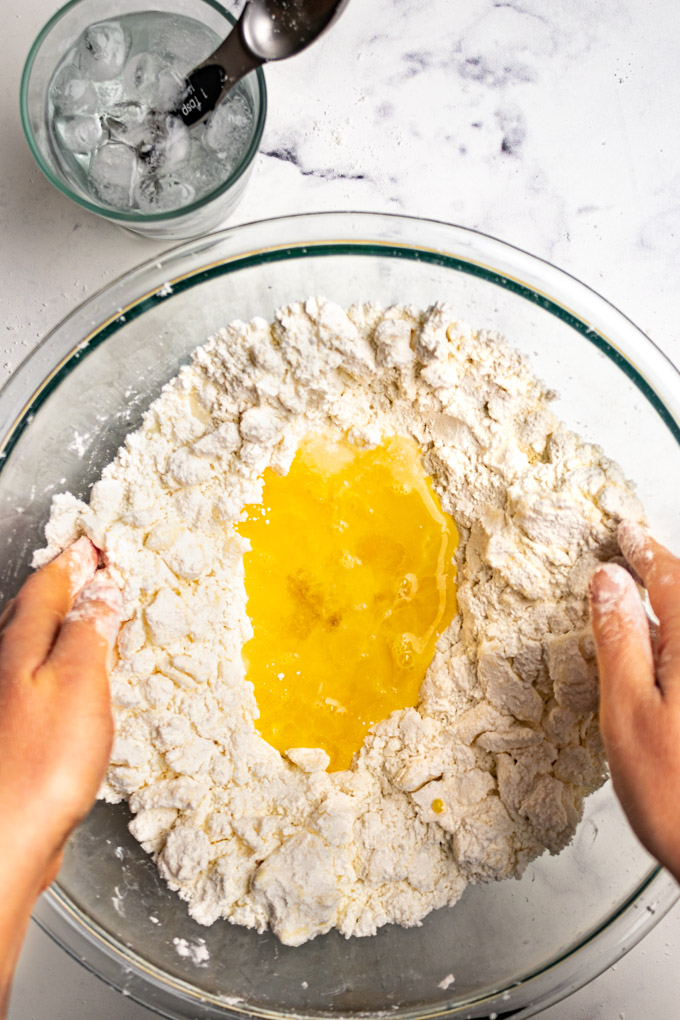
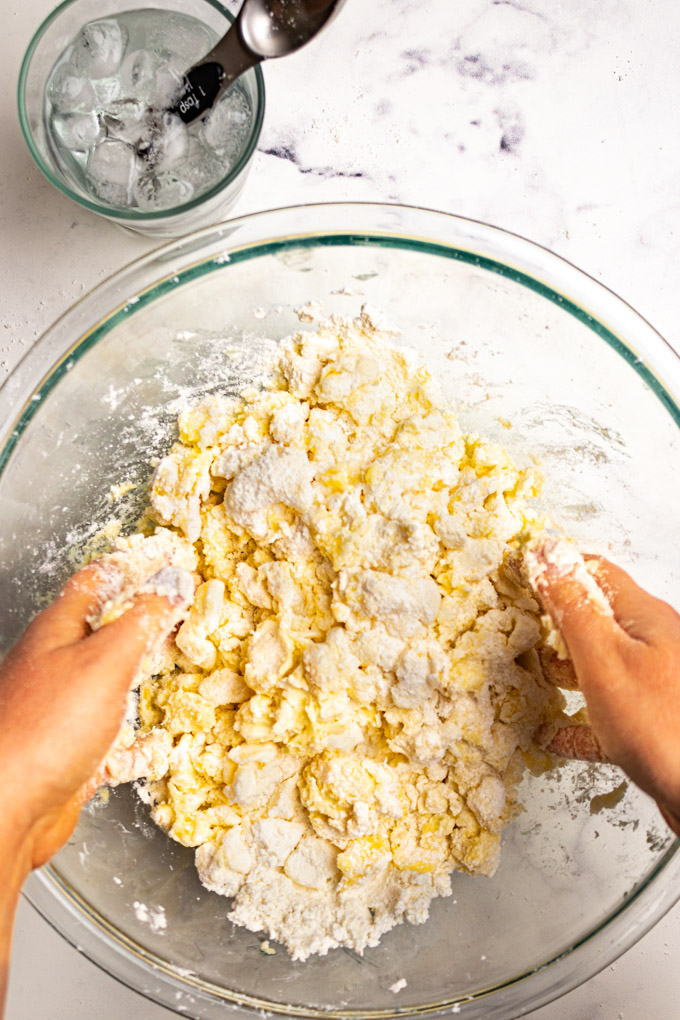
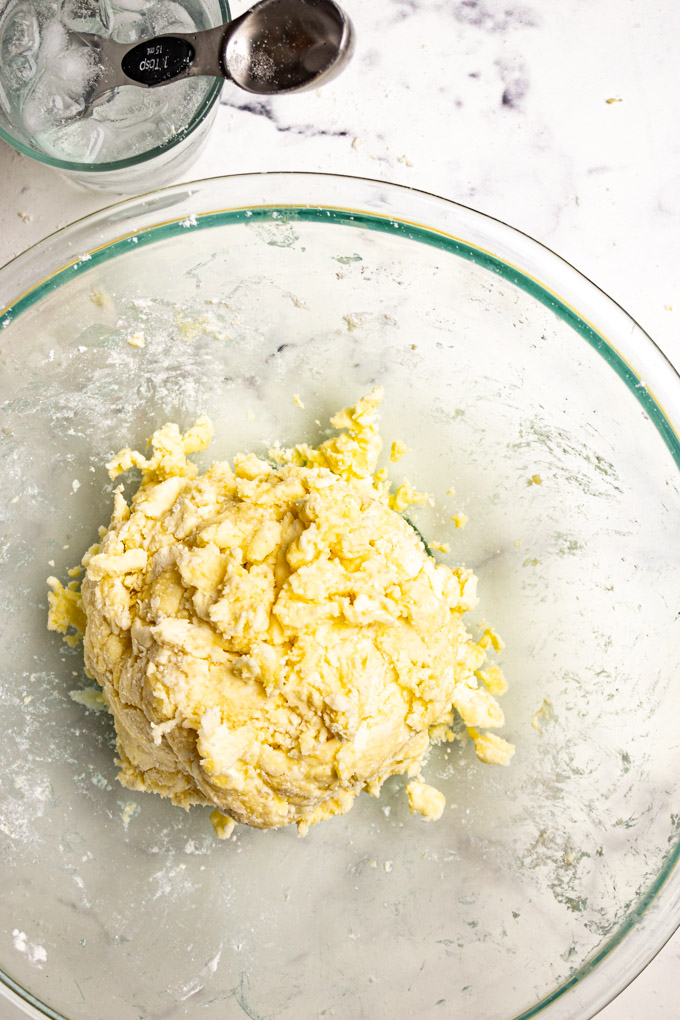
- Add the wet ingredients: Once the butter is fully incorporated, make a well in the dry ingredients – into the well add your whisked eggs, vinegar, and 3 tablespoons of ice water. Use your hands, or a rubber spatula, to gently mix the liquid into the flour mixture. If using your hands (again, this is my preference, so you can feel the dough), then gently do a tossing motion with your hands to combine the flour. Once you have initially combined the first amount of liquid add about 2 tablespoons more water, and mix again. If it seems like a portion of the dough is well hydrated, but some of the dough at the bottom is not, then I find it helpful to remove the hydrated portion of dough from the bowl and set it aside on the counter – then, I add 1 tablespoon more of water and gently mix until it looks like it’s coming together. If it still needs more water, then use your fingers to sprinkle in a little more water. Sometimes all you need is the smallest bit of hydration for it to come together. Once everything looks moist, and there aren’t any large flour-y areas, add the extra dough back into the bowl (if you removed it), and use your hands to knead the dough about 3 to 4 times, just so that the dough comes together into a shaggy looking ball (see photo in post). Note: the amount of water you will need can vary on the atmosphere, or the type of flour you are using. It’s all about knowing what you’re looking for with pie crust. If you’re new to pie crust, keep at it – it takes practice.
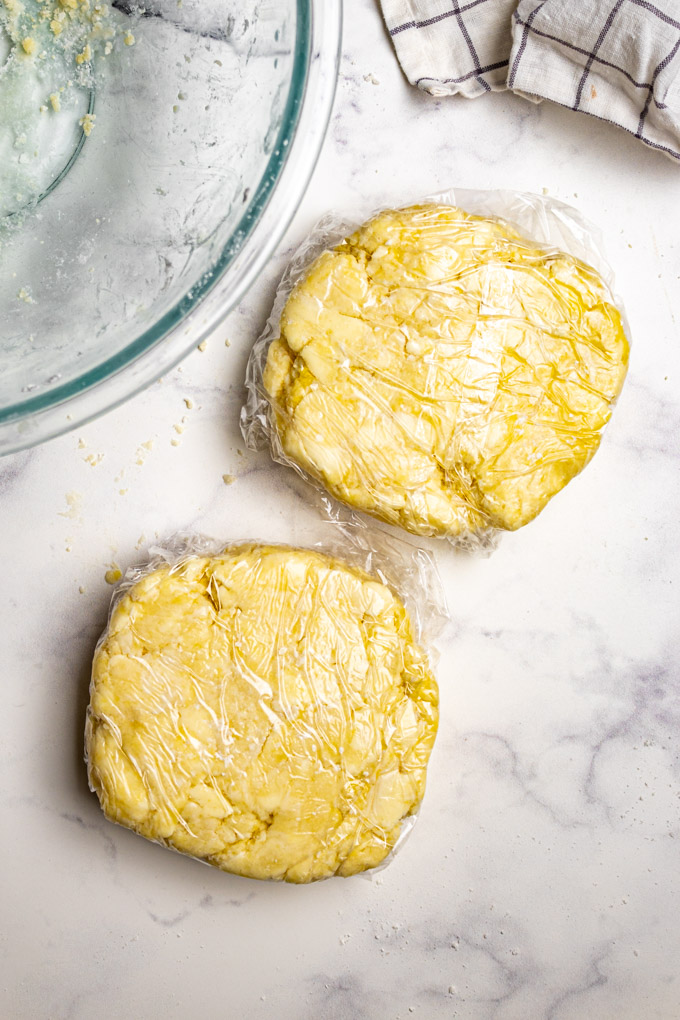
- Wrap up the dough: Transfer the dough to your work surface, and use your hands to flatten it into an even disc. Use a butter knife, or bench scraper to cut the dough in half. If you want to ensure you have even amounts of dough, then weigh each half – most of the time, I just eye ball it. Form each half into a smaller disc, and wrap each half tightly in plastic wrap. This recipe makes a double crust (see notes for freezing the other half if you’re only making a single crust pie).
- Freeze the crust: Place the pie dough into the freezer and freeze for 30 minutes, or until the crust is firm, but has a little give to it. If you’re not ready to work with it yet, you can place it in the fridge after the 30 minutes. Note: at this time, you can also place your rolling pin in the freezer. This isn’t necessary, but I find this very helpful to keep the dough cold. If making the crust in advance, place the crust in a ziploc bag, then you can just place in in the fridge for up to 1 day. Or, you can freeze it for several days, then defrost in the fridge overnight. (see notes for freezing the crust long term).
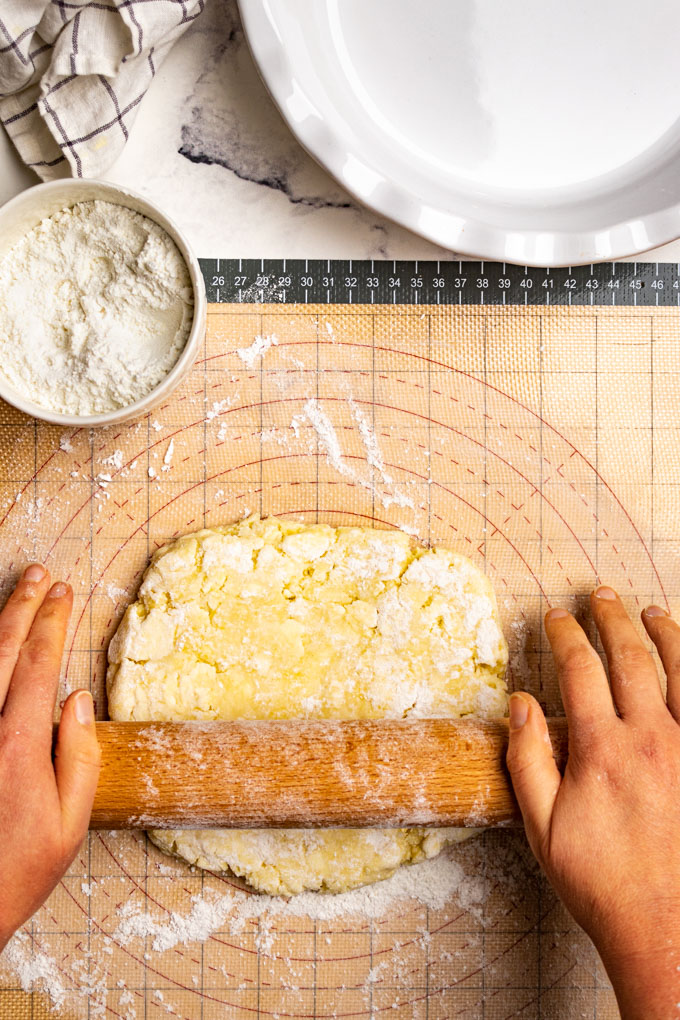
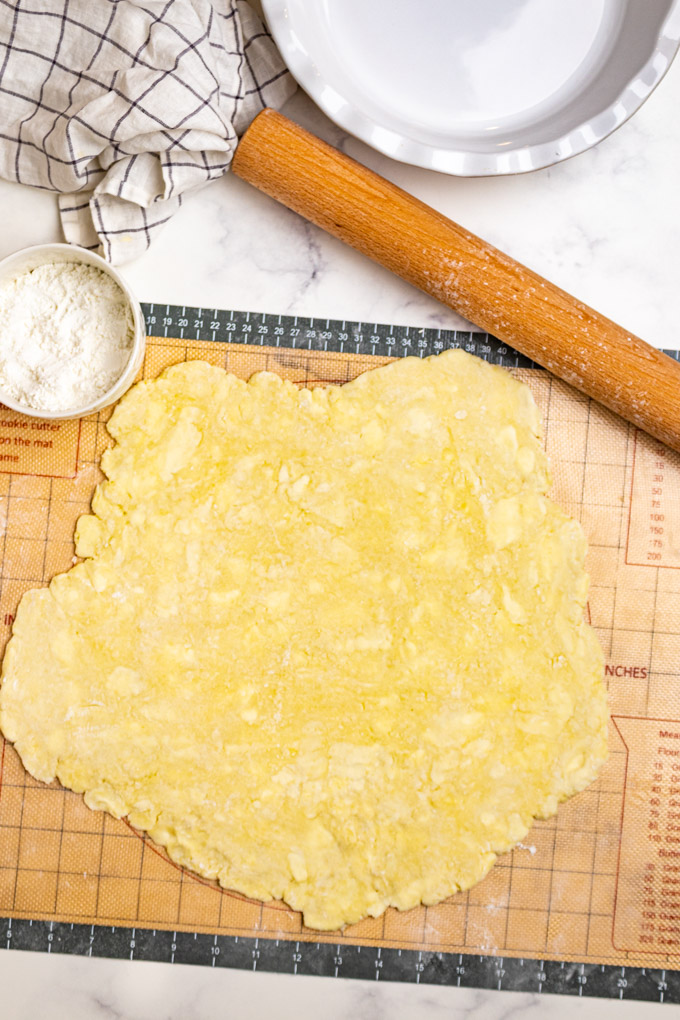
- Roll out the dough: When you’re ready to roll out the dough, make sure you have the bowl of dusting flour ready, and your work surface has been cleaned well. Also, have your pie plate next to your work surface. I like to use a pastry mat, I found the pie crust stuck less, and it helped me roll the crust to the correct size. Dust your work surface with the flour mixture, unwrap the pie crust, and place it onto the work surface, dust the top of the pie crust. Starting in the middle of the crust, roll the rolling pin away from you all the way to the edge, then roll it back towards you, all the way to the edge -until you have a rolled over the entire crust. Use your hand to rotate the crust so that you will be rolling the opposite direction now – repeat the rolling method. Then, use your hands to carefully flip the curst over – adding more flour under the crust, if needed. Repeat that rolling method, making sure to rotate the crust again so you are creating a circle. Repeat this process, rotating after every single roll, and flipping the crust every two times, until your curst has reached about a 13 inch circle (for a standard 9 inch pie plate). NOTE: the rotating, and flipping process helps with preventing the pie from sticking. It takes a little practice to flip it over as the crust gets larger, but it’s really helpful to master. Be sure to flour the work surface as needed, but not so much that you’re drying out the crust. I like to flip my plie plate over and hold it over the crust to make sure it’s large enough – it should be about 2 inches larger than the pie plate. Some cracking of the crust on the edges is normal, if this happens, I use the warmth of my fingers to sort of smoosh it back together as I go. If you have a lot of cracking, like in the center of the crust, then see the troubleshooting section of the post above. Note: if at any time the crust becomes too warm, slide it onto a rimless baking sheet (this is also why the pastry mat is helpful), and pop it in the fridge for 5 to 10 minutes.
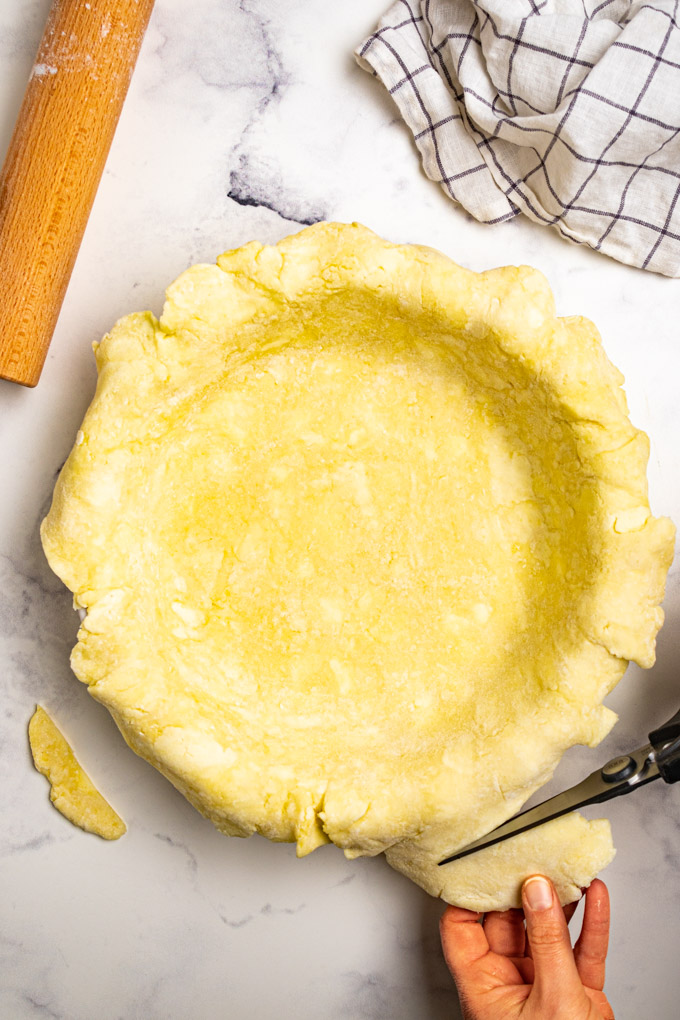
- Line the pie plate: You can either fold the crust into 4ths an then unfold it into the plate, or roll the crust onto the rolling pin, then gently unroll it over the pie plate. Once the crust is on the pie plate, quickly use your hands to grab the edges of the crust, and lift the crust up and settle the crust to the center of the pie plate. Be careful not to stretch the crust. Then, use your hand to push the crust against the sides, to make sure the crust is touching the sides. Use kitchen sheers, or a sharp knife, to trim off any excess pie crust from the plate – you want to leave about 1/2 inch to 1 inch of excess crust, for crimping.
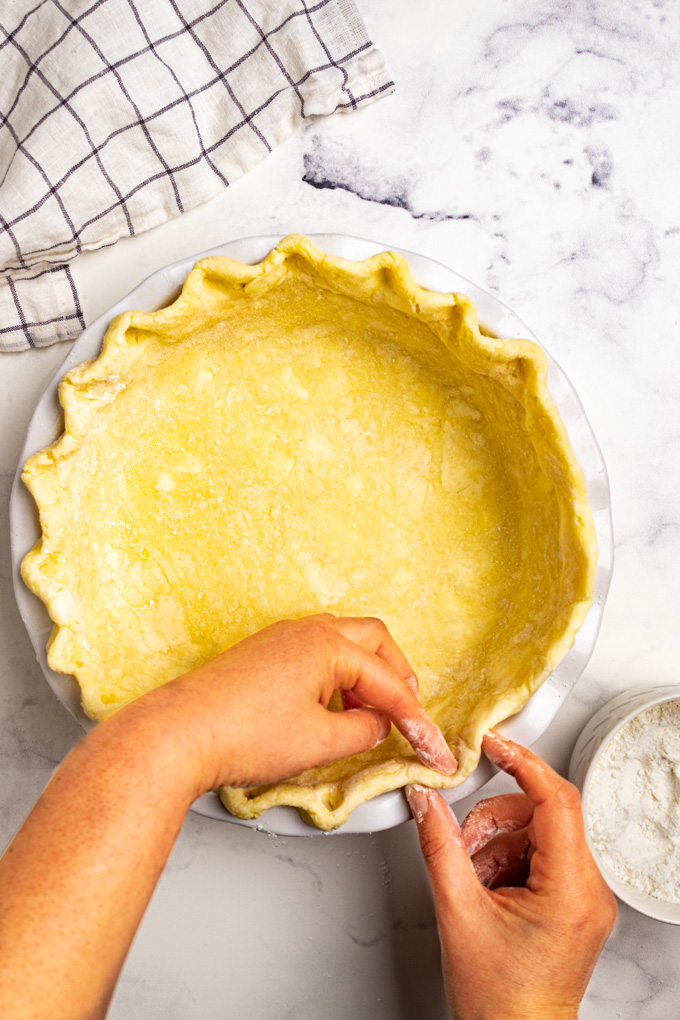
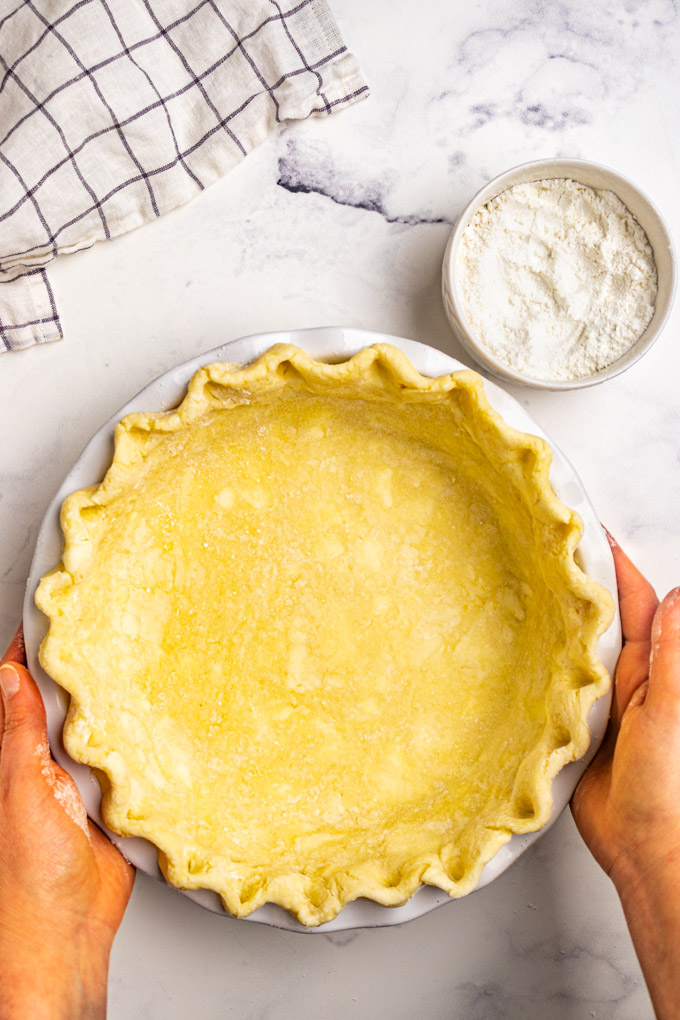
- Crimp (for a single crust pie): If making a single crust pie, then fold the edges of the pie up onto the lip of the pie so that it’s a double crust, and creates sort of a “wall” that stands up. You can crimp the crust any way you like. You can use the tines of a fork, or do a classic, scalloped crimp (like what’s pictured), with one hand, make the shape of a “U” with your thumb and pointer finger, with the other hand, use your pointer finger. Use the thumb and pointer finger to push one portion of the crust into a sideways “U” shape, while at the same time, use the pointer finger of the other hand to push the dough between the 2 fingers into a wavy edge. Repeat all around the crust. Once it’s done, go back and use a finger to press the crust to the edge of the pie plate – this helps to anchor the crust to the pie plate. Be sure to flour your fingers, or your fork, if anything is sticking.
- Freeze & dock the crust (for a single crust pie): Cover the crust with plastic wrap, and freeze for 15 to 20 minutes, until the crust is very frim to the touch. At this time you can preheat your oven as instructed for a single crust pie recipe. Remove the plastic wrap, and use a fork to dock the bottom and sides of the crust all over. The holes will help prevent the crust from puffing up during baking. At this time you can continue with blind baking, or par baking your crust, as it is stated in the recipe for your single crust pie.
- For a double crust pie: For a double crust pie you will want to do everything the same up to placing the pie crust in the pie plate, and trimming the crust to 1 inch. From there, you can cover the crust and freeze it, while you roll out the top crust. Once the top crust is rolled out, remove the bottom crust from the freezer and add the fruit filling. Then place the top crust onto the pie filling. At this time, preheat your oven to the temp your recipe states for a double pie crust.
- Crimp (for a double crust pie): Use your fingers to press the bottom and top crust together so that they are sealed together, making it one cohesive crust. Trim the crust using kitchen sheers so that there is about 1 inch of crust. Then fold the top crust underneath the bottom crust to really seal the pie. From here you can crimp the crust however you want. You can use the tines of a fork to crimp it, or do the traditional scallop crimp (see crimping for single pie crust, above – the same method applies). Use a sharp knife to cut several vents into the top of the pie crust. From here, proceed with the direction for baking for your double pie crust recipe. If the crust seems warm, I recommend popping the pie in the freezer for 10 minutes before baking.
Notes
Butter – Through research, and testing, I found that a European butter (which has more fat) has a better taste, but it is harder to work with. Due to the extra fat, the butter melts faster. So, if you are a beginner with pie dough, then I recommend using an American butter. American butter has less fat in it so it won’t warm up as fast when you are working with it. I found that I liked the combo of half salted butter, and half unsalted butter the best. This resulted in a well seasoned, but not overlay salty crust. However, you can use either all unsalted butter, or salted butter, if you prefer.
eggs – Don’t skip the eggs. The eggs help bind the crust to make up for the lack of gluten in the crust. Sorry, I can’t recommend an alternative for vegans.
vinegar – Don’t skip the vinegar either. The vinegar keeps the crust tender. Trust me, without it, you will have a tough crust. Don’t worry, you don’t taste the vinegar at all.
flour – I highly recommend using Cup4cup multipurpose flour. I tested this crust using another brand, and it was tough, and hard to work with. I had the most consistent results that tasted the most like a regular pie crust with cup4cup. However, I haven’t tested it with all brands of gluten free flour blends, so if I do try another brand with success, I will update this recipe. I found the best place to buy cup4cup, in my city at least, is on Amazon. You can purchase it here.
Dusting flour for rolling the dough – To reserve the cup4cup for using in the pie crust, I used a cheaper gluten free flour by using a combo of cornstarch, and white rice flour (both of which, are ingredients in cup4cup). The combo of both gives the right amount of texture and grip from the white rice, and the cornstarch provides the right amount of fine, easily spreadable fluffiness.
Freezing pie crust – If you are making a single crust pie, then you will have one pie crust leftover. You can store it in the freezer for up to 6 months. Tightly wrap it in plastic wrap, then place it in a ziploc bag that is labeled. When you’re ready to use it, defrost the crust in the fridge overnight. You could also do this for a double crust recipe if you want to make the crust in advance…or, just to keep crust at the ready for whenever you want to make a pie.
This recipe is adapted from the book, Art of the Pie by Kate McDermott – it’s also a great resource for any pie making. I also adapted a lot of methods from the video: “How to make Pie dough & crust” with Erin McDowell.



Leave a Reply