This post may contain affiliate links. If you buy something through one of these links, we may earn an affiliate commission - at no extra cost to you.

I have been dying to share these peanut butter eggs with you. In fact, I have had them on my list of recipes to make, for years!!!
Let’s finally make some homemade peanut butter eggs, shall we?!?!
Who else thinks that Reese’s candy is the BEST candy of all times? I love that peanut butter center, with the chocolate on the outside. So good! The only thing is, as I have gotten older Reese’s candy has become way too sweet for me. One piece of candy, and I am done for a year.
So, let’s make a healthier, less sweet, and more delicious, version of peanut butter eggs for Easter this year.
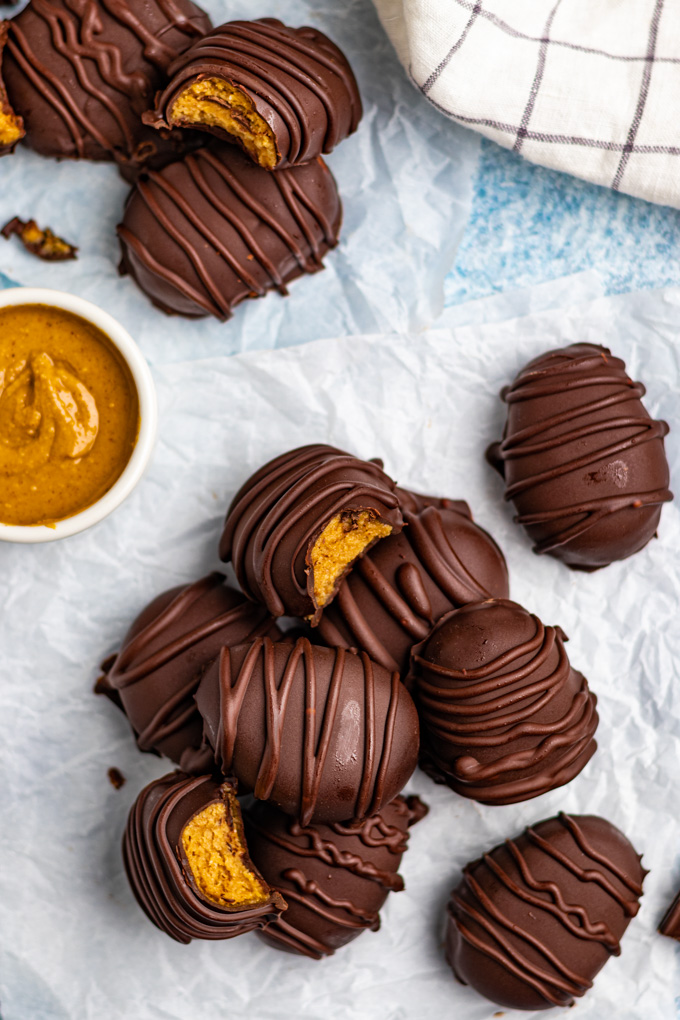
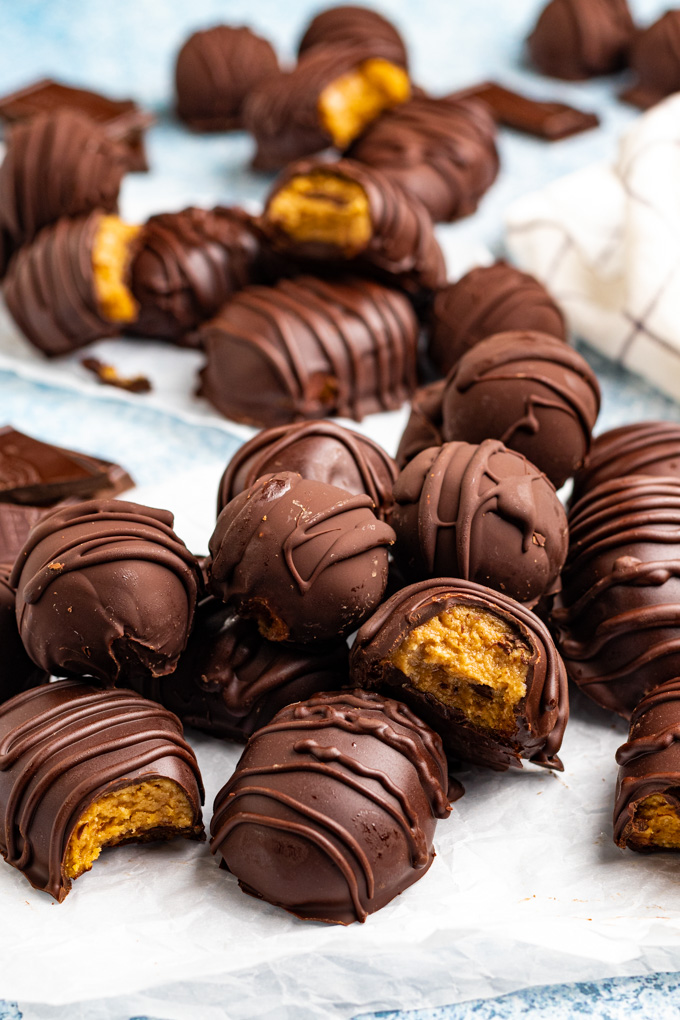
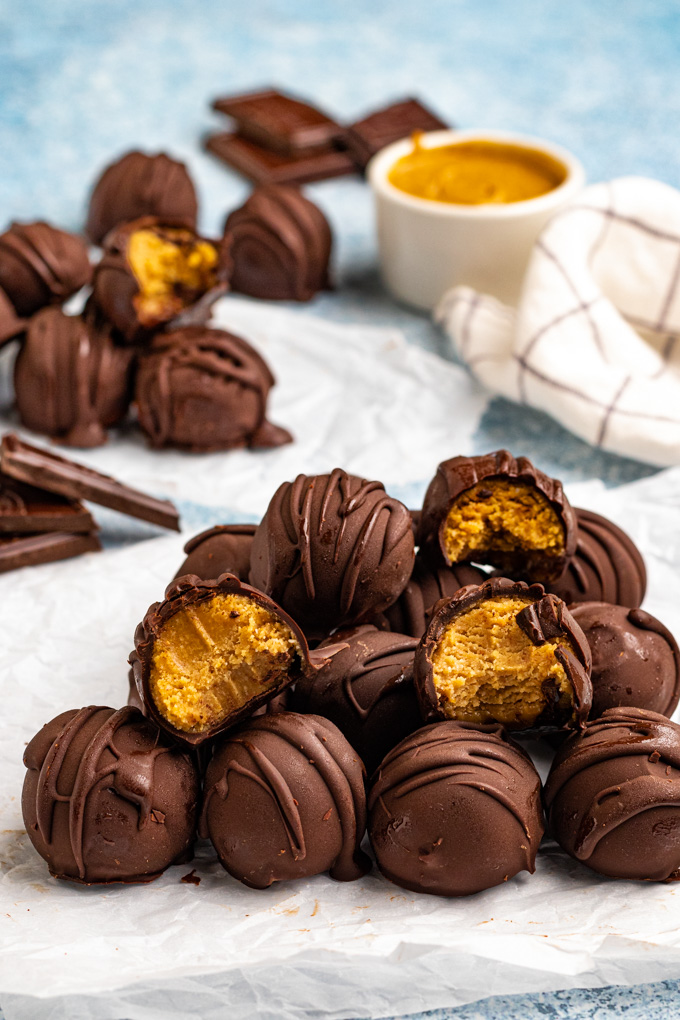
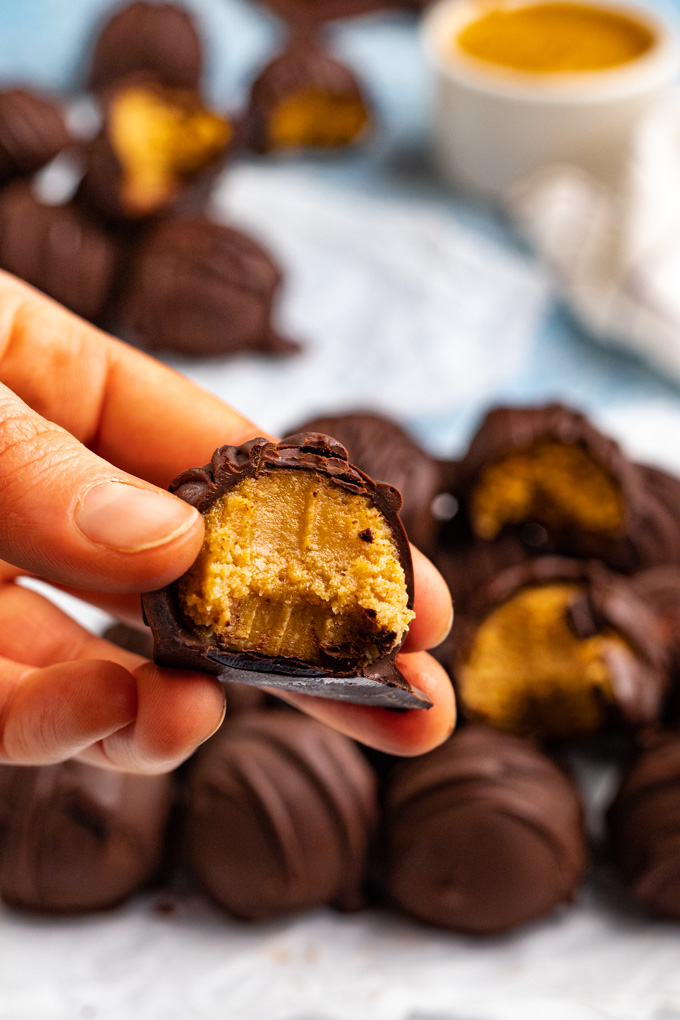
These peanut butter eggs have rich, lightly sweetened peanut butter center that’s perfectly soft, and creamy. The peanut butter is coated in a layer of crunchy dark chocolate that compliments the peanut butter nicely.
They’re everything I always hope a Reese’s peanut butter egg will be, and more.
My dreams have come true!
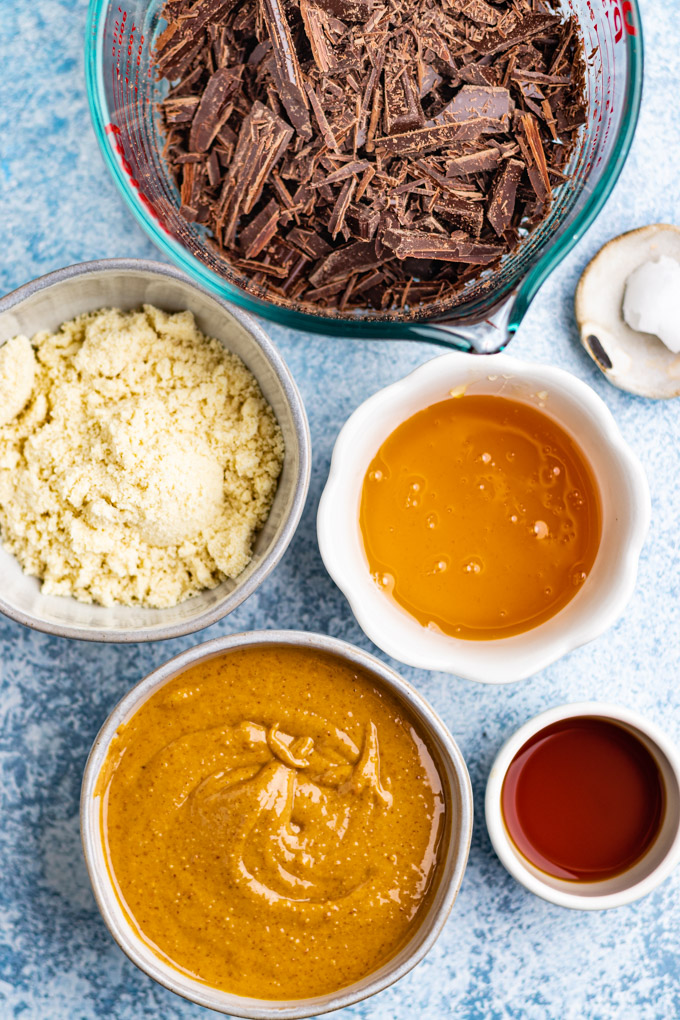
Ingredients for peanut butter eggs:
As always the full ingredient list, with the measurements, are listed in the recipe card below. But, let’s discuss the ingredients here so you have a better understanding.
- peanut butter – natural, creamy peanut butter. The only ingredients should be peanuts, and maybe salt. Pure and simple, no funny business with our peanut butter, friends.
- honey – just enough to lightly sweeten the peanut butter. You can use maple syrup, but I prefer the honey since the honey is thicker, it helps the peanut butter portion to hold together better.
- vanilla extract – can’t go wrong with adding a hint of vanilla.
- blanched almond flour – the almond flour binds the peanut butter together, creating a thicker dough that can be formed into egg shapes. You won’t taste it, and it doesn’t really affect the texture of the peanut butter.
- dark chocolate – for the chocolate coating. I like using a dark chocolate that has at least 60% cacao in it. You could, of course, use a milk chocolate, if you prefer for a sweeter peanut butter egg.
- extra virgin coconut oil – just a little bit melted into the chocolate helps the chocolate to be slightly softer when you bite into the egg.
That’s it. Super simple ingredients that you likely already have on hand.
Peanut butter eggs all the time, please!
How to make peanut butter eggs:
Of course there are more detailed directions in the recipe card below, but let’s give you a snapshot here.
- mix the peanut butter filling together.
- freeze the filling. (There is a lot of freezing involved in this recipe, FYI).
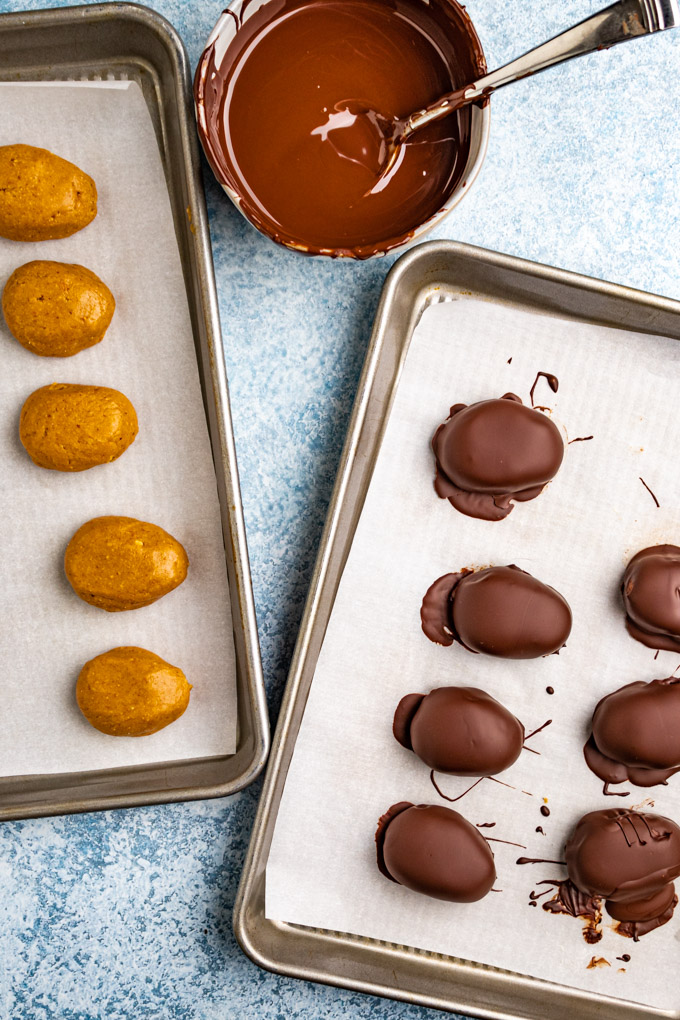
- shape the peanut butter dough into eggs.
- freeze the peanut butter eggs.
- melt the chocolate.
- cover the peanut butter eggs in chocolate.
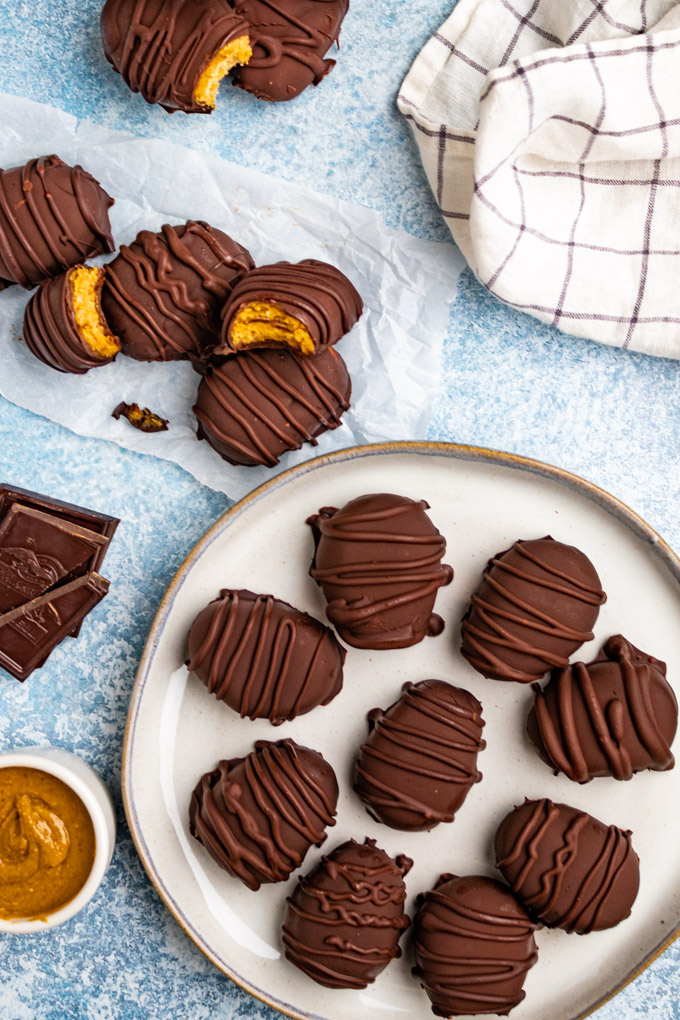
- decorate – use leftover chocolate to drizzle over the eggs. You could also use colorful candy melts if you want to be extra festive.
- freeze, one last time – just to set the chocolate up.
- store – these babies last up to 3 months in the freezer.
- to eat – allow the eggs to sit at room temp for 10 to 20 minutes, or until they soften up a bit. And, enjoy!
I mean, just look at how cute they are!
Can I freeze peanut butter eggs?
Yes.
In fact, that’s exactly how I suggest you store these peanut butter eggs, in the freezer.
Once they’re frozen, you can either put them into a freezer bag, or into a Tupperware container.
How long will these peanut butter eggs last?
3 months when stored properly in the freezer.
Peanut butter Easter eggs, ready and waiting for you for 3 months! Heck YES!
Option to make them into balls:
If you want to make these for another holiday, or just because, you can easily make the same recipe into little peanut butter balls.
They’re just as good and, actually a bit easier to make.
I think the peanut butter balls option would be perfect for Christmas, Valentine’s Day, or whenever you’re craving a peanut butter and chocolate candy moment.
Why are these peanut butter eggs healthier than the store bought candy?
- They contain simple ingredients,
- and no preservatives.
- They’re naturally sweetened with honey (aside from the sugar in the chocolate).
- They have way less sugar than Reese’s candy.
- They have natural peanut butter without added oils.
- healthy fats – from the peanut butter.
- a little protein – from the peanut butter.
- added fiber – from the almond flour.
- antioxidants – from the dark chocolate.
- stabilizes blood sugar levels – due to the balance of fat, fiber, and protein…and less sugar.
Obviously, this is still a dessert, but it’s one that tastes way better than the store bought candy, and it’s healthier too. I call that a win!!!
Reasons you will go nuts for these peanut butter eggs:
- They’re so delicious – better than Reese’s.
- They’re bursting with creamy peanut butter flavor,
- and covered in dark chocolate.
- They’re easy to make.
- They’re no bake.
- They’re fun,
- and festive for Easter.
- They can be made into ball shapes.
- They store in the freezer for 3 months.
- They’re healthier.
- They’re naturally gluten free.
- They can easily be adapted to be vegan,
- and dairy free.
- They’re fun,
- and nostalgic.
More chocolate peanut butter treats:
- chocolate peanut butter chia seed pudding
- healthier scotcharoos (without corn syrup)
- peanut butter and chocolate puffed rice treats
- peanut butter chocolate granola (dessert granola)
More Easter recipes:
- roasted red pepper deviled eggs
- healthy spiced carrot muffins
- no bake carrot cake balls
- vanilla cashew butter cups
- sheet pan Easter dinner (serves 4 people)
Did you make this recipe?
Let me know how it went. Leave a comment below along with a star rating. This helps me out a lot, and always like hearing from you. Thanks, friends.
Print
Peanut Butter Eggs (Healthy)
- Prep Time: 30
- Freeze Time: 2 hours
- Total Time: 2 hours 30 minutes
- Yield: 12 to 14 eggs 1x
- Category: dessert, chocolate, snack, no bake
- Method: mixing, freezing
- Cuisine: gluten free, vegetarian, easy
- Diet: Gluten Free
Description
Peanut butter eggs have a rich peanut butter center with a dark chocolate shell. They’re easy to make, and so much better than Reese’s. You can also make them into ball shapes, so that you can enjoy them any time of the year.
Ingredients
Peanut butter filling
- 1 cup natural creamy peanut butter
- 1/4 cup + 2 tablespoons honey
- 2 teaspoons pure vanilla extract
- 1/4 cup + 3 tablespoons fine blanched almond flour
Chocolate coating
- 8 ounces dark chocolates (I like 60% cacao)
- 1 teaspoon extra virgin coconut oil
Instructions
- Mix together the filling: In a medium-sized mixing bowl use a spatula to mix together the peanut butter, honey, and vanilla extract, (Note: if your peanut butter doesn’t contain any salt, add a pinch of kosher salt to the filling), mix until well combined. Stir in the almond flour in in batches, until it is well mixed. The filling should have thickened quite a bit.
- Freeze the filling: Place the bowl in the freezer for 35 minutes, or until the dough is mostly solid, but still pliable. In the meantime, line a rimmed baking sheet with parchment paper.
- Shape into eggs: Scoop out about 1.5 tablespoons of the chilled dough (I like using a medium sized spring-loaded cookie scoop to make this easier), and place it in your hand. Use both hands to roll the dough into a ball, then flatten the ball out a little and use your fingers to taper off one end of the sphere to look like an egg shape. It’s okay if they look a little rustic at this point, they will look more like eggs once they are covered in chocolate. I did find it helpful to google a picture of a peanut butter egg to look at for reference. Place the peanut butter egg onto the parchment lined baking sheet, and continue until all of the dough has been used. You will have about 12 to 14 eggs. (See notes below about making these into balls instead of eggs, if desired).
- Freeze the peanut butter eggs: Place the peanut butter eggs in the freezer for 1 to 2 hours, or until the eggs are pretty well frozen solid.
- Melt the chocolate: Just before you are ready to cover the eggs, chop up the chocolate, or break it up into small pieces, and place it into a microwave safe bowl (I like using a large glass liquid measuring cup since it has the handle, so I won’t burn myself), along with the coconut oil. Microwave the chocolate on high for increments of 30 seconds, stirring in between, just until melted. Alternately, you could melt the chocolate using the double boiler method.
- Cover the peanut butter eggs in chocolate: This step can be a little tricky. The peanut butter doesn’t fully freeze, and melts sort of fast, so I suggest keeping most of the eggs in the freezer, and only having 3 uncovered eggs out of the freezer at a time. I covered a plate in parchment paper to place in the freezer to temporarily hold the eggs that were waiting to be covered. To cover the eggs, drop one egg at a time into the melted chocolate and use a spoon to spoon the chocolate over the egg. Use a fork to lift the egg out of the chocolate, tap any excess off, and place back on the parchment lined baking sheet. Repeat until you have worked through all the eggs. Work quickly, as the eggs do get soft from being left out. If the chocolate starts to get too thick at any point, give it a 20 second blast in the microwave to warm it back up.
- Decorate: I like to use the remaining chocolate to drizzle over the eggs, using a spoon. This is optional, of course. Another fun option could be to use some died candy melts in various colors. This would be especially fun if you’re making these eggs for kids.
- Freeze, one last time: Freeze the chocolate covered eggs for 15 minutes, or until the chocolate is set.
- Store: Once the eggs are frozen, they can be transferred to a freezer ziplock bag, or an airtight container. They will last in the freezer for up to 3 months.
- To eat: Pull as many eggs as you plan to eat out of the freezer, and allow them to come to room temp for 10 to 20 minutes, before eating. The peanut butter eggs are best stored in the freezer and then allowed to come to room temp, just before eating them. They will start to get a bit too soft when left at room temp for longer than 45 mins (ish).
Notes
make them into balls: If want you can make these into balls instead of eggs, you can. They are a little easier to work with because there is less shaping involved, and it’s easier to cover the smaller portion in the chocolate. The balls would be a great option if you want to make the same dessert any other time of the year. To make the balls, follow the same directions, only portion out 1 tablespoon of the dough, and roll it into balls. You will gave about 23 balls.
maple syrup: You can use maple syrup in place of honey, I did test this recipe using maple syrup, it works. However, the filling does hold together just a little bit better when using the honey because it’s less liquidy.
vegan: To make these vegan use maple syrup instead of honey (see note above), and use vegan chocolate.
Dairy free: To make this recipe dairy free, use dairy free chocolate.
Peanut butter substitute: you could easily swap the peanut butter with any smooth, natural, nut or seed butter you like. Cashew butter, or almond butter would be great options.

Leave a Reply