This post may contain affiliate links. If you buy something through one of these links, we may earn an affiliate commission - at no extra cost to you.
Is there any other cookie more festive than a sugar cookie cut out that’s decorated for Christmas?!?! These gluten free sugar cookies are just the thing you need to fulfill your Christmas baking, and decorating needs!!!
The best part: you can’t tell that the sugar cookies are gluten free at all. The cookie is firm, but soft and perfectly sweetened.
The sugar cookies have a hint of warming cinnamon, and nutmeg – which are optional – to elevate the flavor of the cookie just slightly. I also added almond extract – also optional – to provide a nice complex flavor. All of these added flavors are not overpowering, they are just a hint that makes the cookie extra special. You can easily leave all of them out, if you prefer.
Top the gluten free sugar cookies with some sugar cookie icing, (recipe included), or royal icing, to decorate. I love that the cookies themselves aren’t super sweet, leaving plenty of room for the icing to add more sweetness, without making the entire cookie cloyingly sweet.
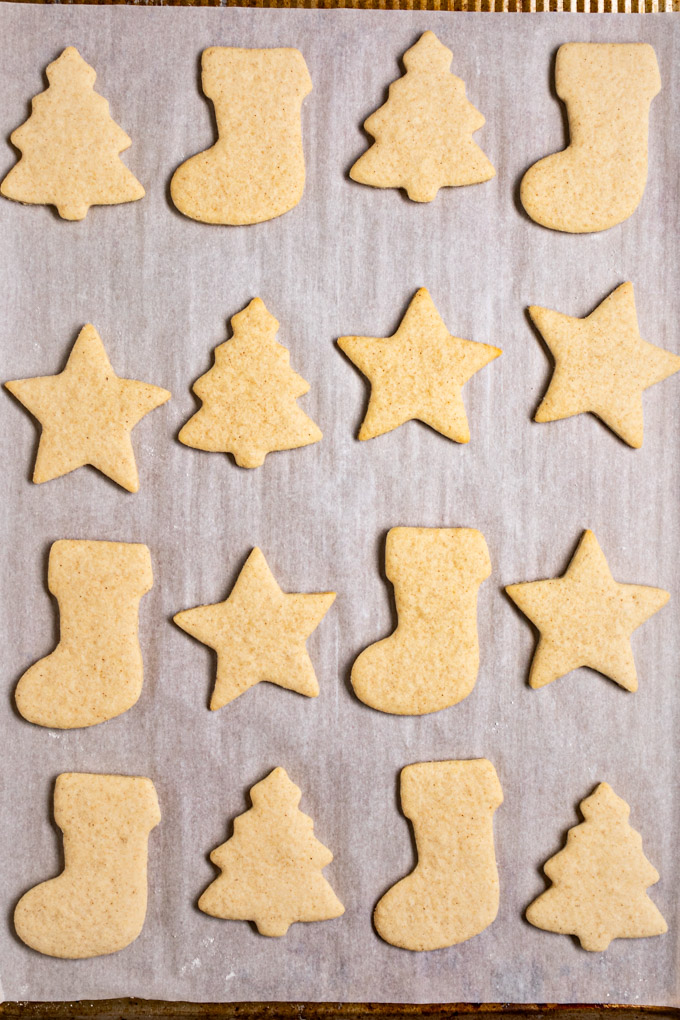
The gluten free sugar cookie dough is super easy to handle. You won’t even know it’s gluten free. It rolls out like a dream, cuts into shapes like a dream, and holds it’s exact shape when baking.
YES, that’s right – THESE COOKIES WON’T SPREAD WHILE BAKING!!!
Sorry to yell, but everyone needs to know about it because I know how disappointing it can be when sugar cookies spread, and get misshapen. Cute little reindeer is now a sad blob!!!! Not good!
Some of my favorite Christmas memories as a kid was decorating sugar cookie cut outs with my mom and friends. I am excited to be able to share this fool-proof gluten free sugar cookie recipe with my parents, who are sensitive to gluten!!
Of course, you can make these gluten free sugar cookies for any holiday, or any celebration. You can cut them into any shape you would like. Make them for Halloween, Easter, Valentine’s Day. Or, make them to help celebrate a baby shower, a bridal shower, a graduation, or a birthday. The sky is the limit!!!
I know you’ll love these gluten free sugar cookies. They are simple to make, the dough is easy to work with, you can make the dough in advance and freeze it. The cookies don’t spread while baking, and most importantly, they’re delicious!!!
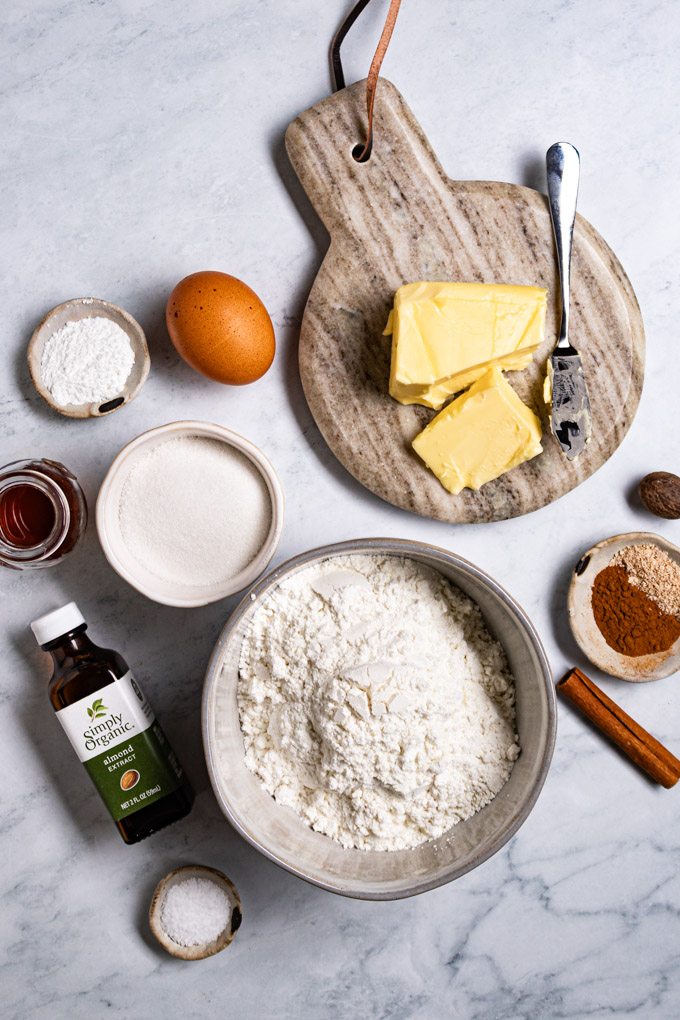
Ingredients for gluten free sugar cookies
As always, the list of ingredients along with their measurements are in the recipe card below. Check it out!
Gluten Free sugar Cookies (Cut Outs)
- Cup4Cup multipurpose gluten free flour blend – Cup4Cup is the gluten free flour blend that I tested this recipe with. From experience I know this gluten free flour blend will work the best for this particular recipe. I know it’s more expensive than other gluten free flour blends, which is why I don’t use it unless absolutely necessary. It’s the same gluten free flour blend I use for my gluten free pie crust! It’s just the best for special recipes like this one.
- baking powder – to provide a little lift, and lightness to our cookies.
- ground cinnamon (optional) – this adds just the loveliest hint of flavor and warming spice that makes the cookies extra special.
- ground nutmeg (optional) – same as the cinnamon. I like the combo of both. You could also sub in cloves, or just use all cinnamon.
- unsalted butter, room temp – the butter adds that lovely buttery flavor to the cookie that we all associate with a good sugar cookie.
- kosher salt – a hint of salt to bring out all the flavors in the cookie, and to balance out the sweetness. If using table salt, reduce the amount by half.
- granulated sugar – a sugar cookie isn’t a sugar cookie without some sugar!!! There is just no way around it!
- egg, room temp – for structure and binding.
- pure vanilla extract – for that lovely flavor that goes so well in pretty much any baked good.
- almond extract (optional) – just like the cinnamon and nutmeg, this is my special kiss of flavor that I think makes the cookie taste better than most. Almond extract is very strong, so make sure you measure. It adds such a lovely sweetness that’s unique. Feel free to leave it out if you’re not a fan.
Easy sugar cookie Icing
This is the icing recipe I used to decorate my cookies. Feel free to use your favorite Icing recipe. For more detailed decorating you will want to use a royal icing.
- powdered sugar – the leading lady of this icing recipe. It provides the sweetness while also providing the right texture, thickness, and glue that holds it all together.
- kosher salt – I like adding a touch of salt to my icing to balance out the sweetness.
- light corn syrup – this ingredient plays an important roll in the icing. It makes the icing easier to work with, it helps the icing to harden, and it makes the icing shiny. It’s not an ingredient I normally use, but it makes a huge difference in how the icing preforms, and only a little bit is required. You can leave it out if you want, see notes of the recipe card for more info.
- milk of choice – to thin out the icing for just the right consistency.
- gel food coloring (optional) – I recommend using gel food coloring rather than a watery one so you don’t risk thinning out the icing too much. Obviously this is optional if you just want a white icing.
When should I make these gluten free sugar cookies?
For any holiday, or any celebration that you want.
I photographed these as Christmas cookies because that’s when they are most popular. But, you can easily use this gluten free sugar cookie recipe and use any shapes of cookie cutters that you want.
Make them for Easter, Halloween, Valentine’s Day, birthdays, weddings, bridal showers, graduations, baby showers – the sky is the limit!
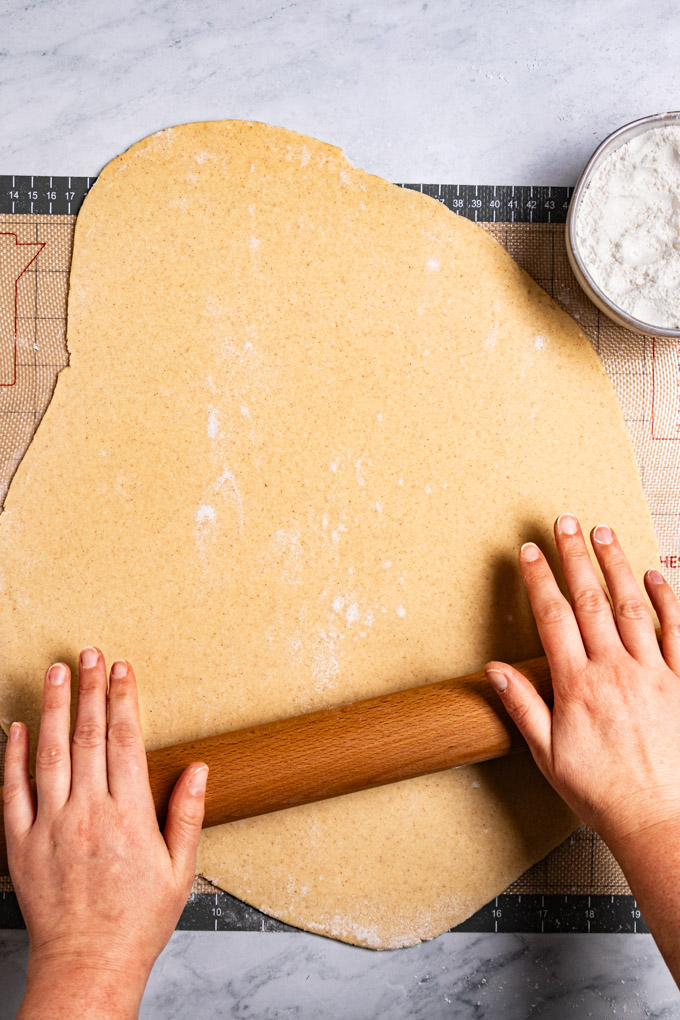
Do these gluten free sugar cookies spread as they are baking?
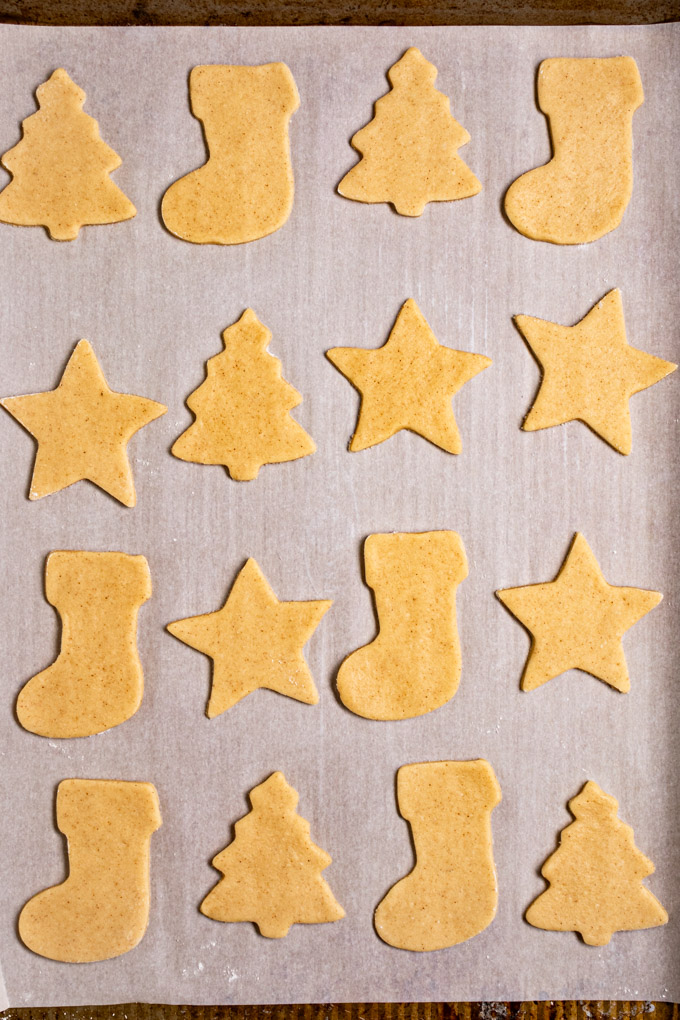
No, they don’t spread at all. They hold their shape beautifully!
And, I love that about them!
Can these gluten free sugar cookie cut outs be made into drop cookies?
No, they cannot be made into drop sugar cookies.
They just don’t have the right texture for a different style of sugar cookie.
stick to the cut outs!
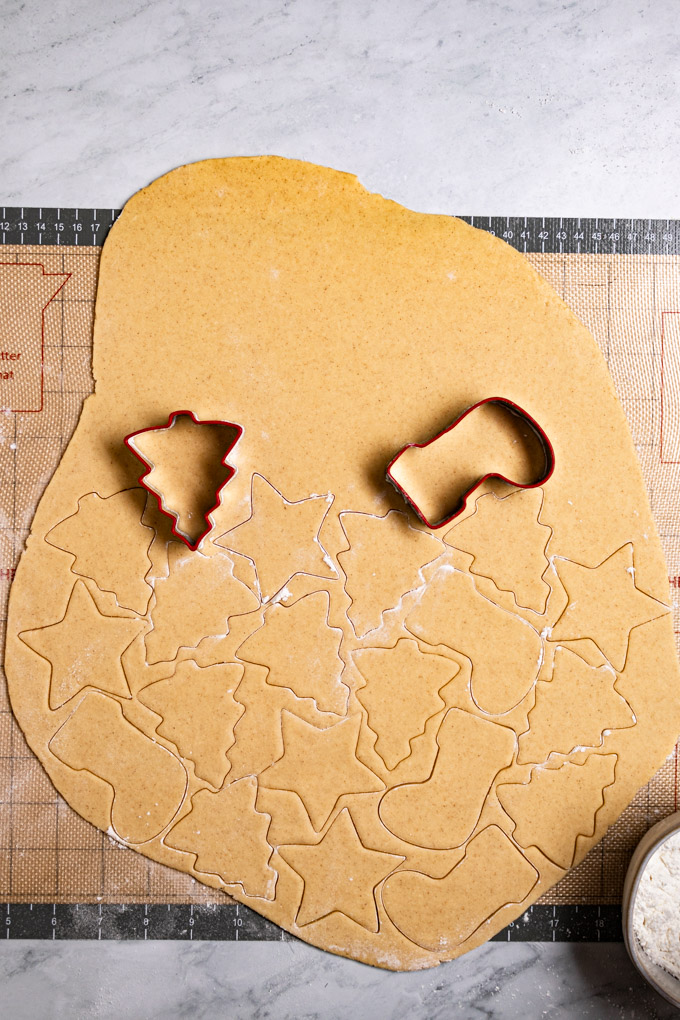
Is this gluten free sugar cookie recipe easy to make?
Yes! They are super easy to make, at least as far as sugar cookie recipes go.
The batter only requires a hand mixer, and a spatula at the end.
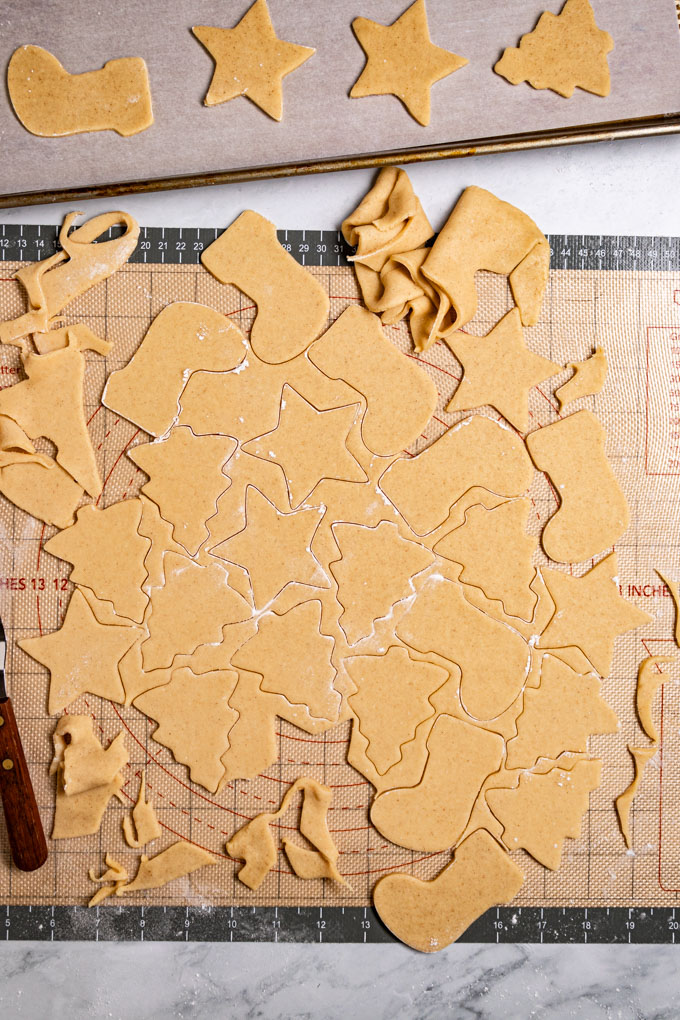
The cookie dough rolls out so nicely – there is no tearing, cracking, or sticking – provided you follow my directions for rolling out the dough. And, they are super easy to bake – no spreading!
That being said, if you have no previous experience with rolling out cookie dough – or other similar doughs – then, it might feel a little more challenging. Just like anything in life, skills take practice to become good at them. I encourage you to have fun with it, and see it as a learning process.
They’re just cookies, after all. You’ve got this!
What kind of gluten free flour should I use to make these gluten free sugar cookie cut outs?
I highly recommend using Cup4Cup multipurpose gluten free flour blend for this recipe.
It’s the one I used when testing this recipe, so I can’t guarantee you will have the same results if you use a different gluten free flour blend. I know from experience of years of gluten free baking that Cup4Cup is the best for this type of recipe.
Can you tell that these gluten free sugar cookies are gluten free?
No. You can’t tell that these sugar cookies are gluten free at all.
The dough is fool-proof to work with, and the cookies themselves are perfection. They are undetectably gluten free.
I even baked up some store bought, non-gluten free, sugar cookie dough to practice decorating on, and we by far preferred my gluten free cookies in taste, texture, and the way the dough handled.
I WIN! Just kidding!
Sort of!
Can I make this gluten free sugar cookie dough in advance?
Yes. You have two options:
- Option 1 -Place the cookie dough in the fridge wrapped in the plastic wrap for up to one day (or overnight).
- Option 2 – Place the plastic wrapped dough into a zipper bag and freeze for up to 6 months. When you’re ready to bake, place the dough in the fridge the day before to soften.
See notes of the recipe card below for more details.
How long will these gluten free sugar cookies last?
They last for up to one week.
Maybe more, but we usually eat them all by then ha!
What kind of cookie icing/frosting should I use to decorate my sugar cookies?
Different kinds of icing for sugar cookies:
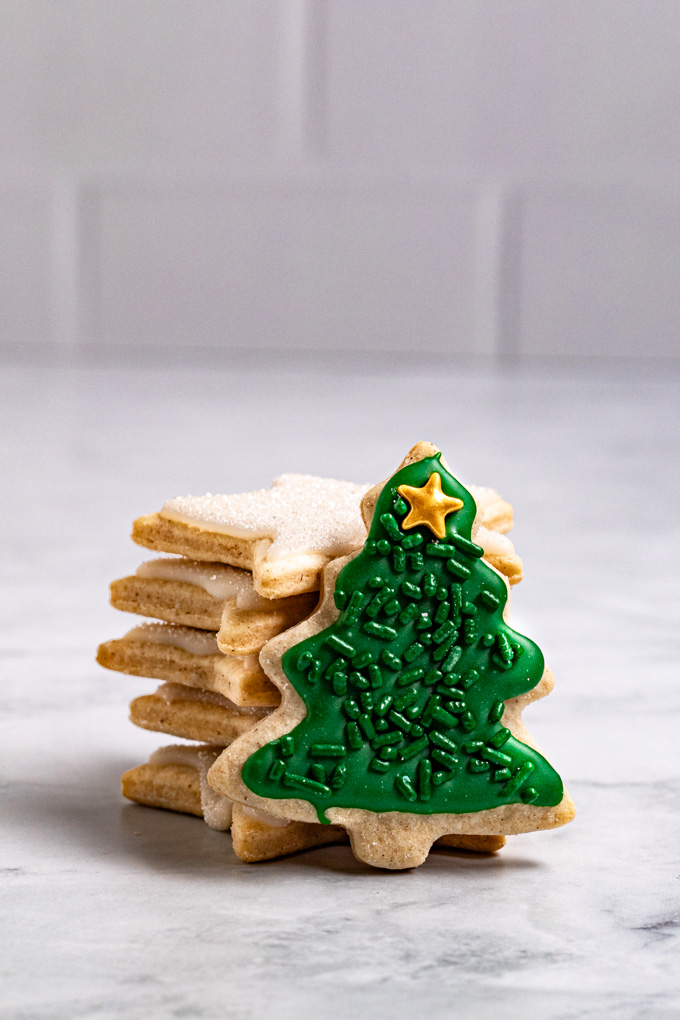
- sugar cookie icing – (recipe included below), this is what I used to decorate my cookies. I like this recipe because it’s easy to make, easy to work with, tastes good, is great for simple decorations, and hardens completely so that the cookies are stackable.
- I adapted Sugar Spun Run’s recipe for Easy Sugar Cookie Icing. I recommend watching her video and reading her post to get more tips and tricks for how to work with the icing.
- royal icing – royal icing is ideal more intricate designs on your cookies. I have never made it. Here is a royal icing recipe to try.
- buttercream frosting – Another option is to use a simple buttercream recipe that you can color with food coloring and spread onto your cookies. Keep in mind that a buttercream frosting will not harden fully, and will need to be eaten a lot sooner, and possibly stored in the fridge. Try the frosting recipe from this frosted sugar cookie recipe.
Tips for decorating your sugar cookies
NOTE: this is in reference to using the sugar cookie icing recipe that I included. There are many more professional techniques and things you can do if using royal icing.
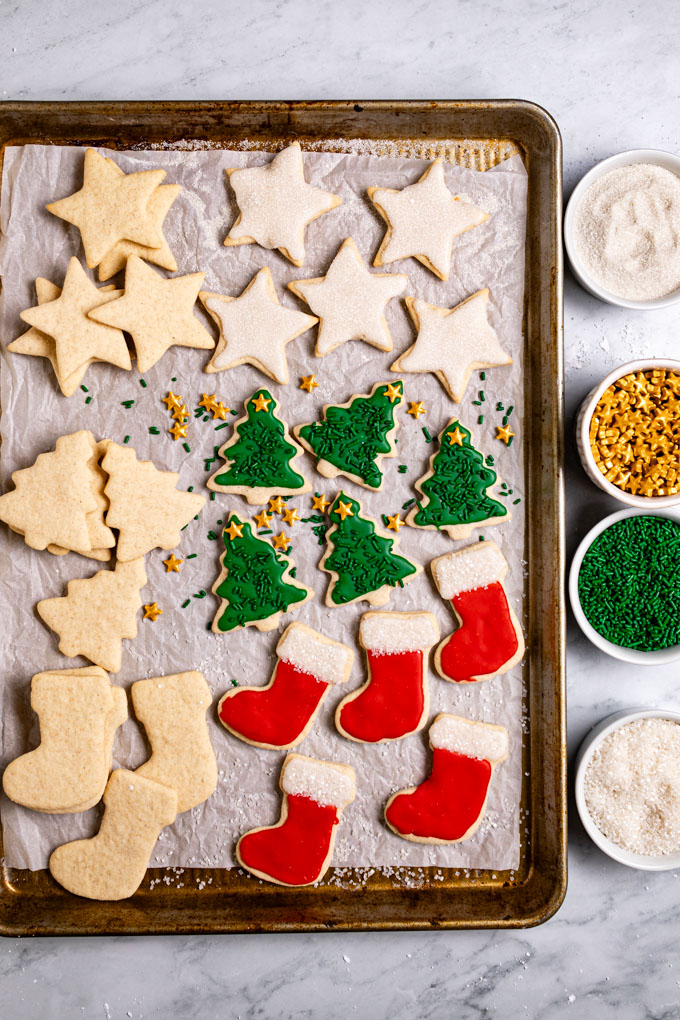
- Outline the shape cookie first – then go back to fill in the rest of the cookie with more icing.
- “Flood” the icing – which just means move the icing around with a toothpick, or scribe tools so that it fills out the cookie without adding too much icing.
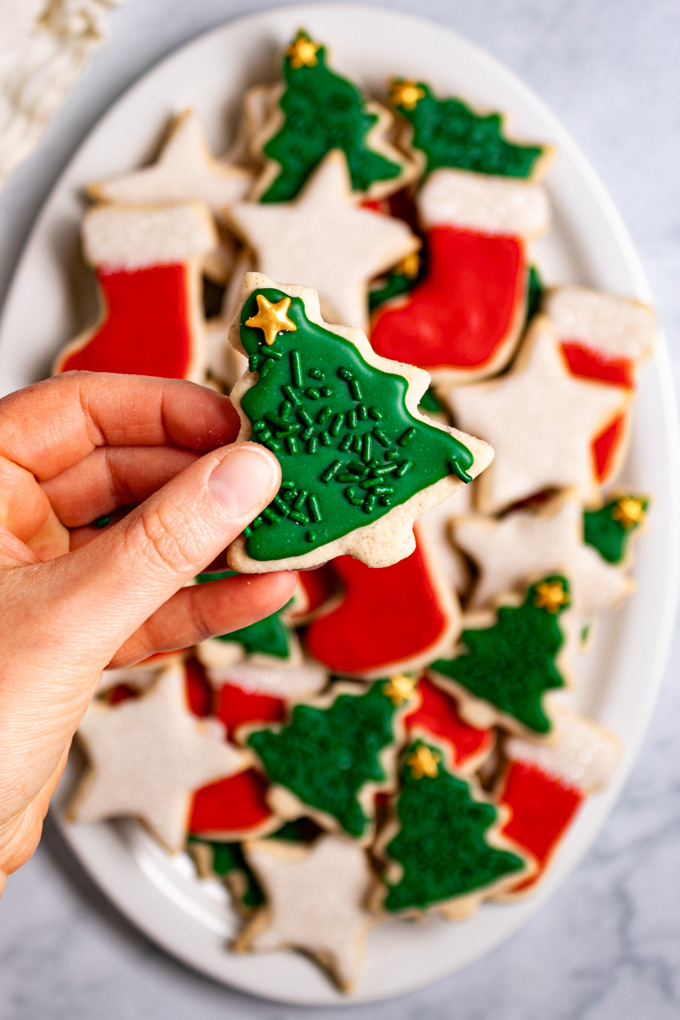
- Add sprinkles immediately – add any sprinkles or sanding sugar while the icing is still wet.
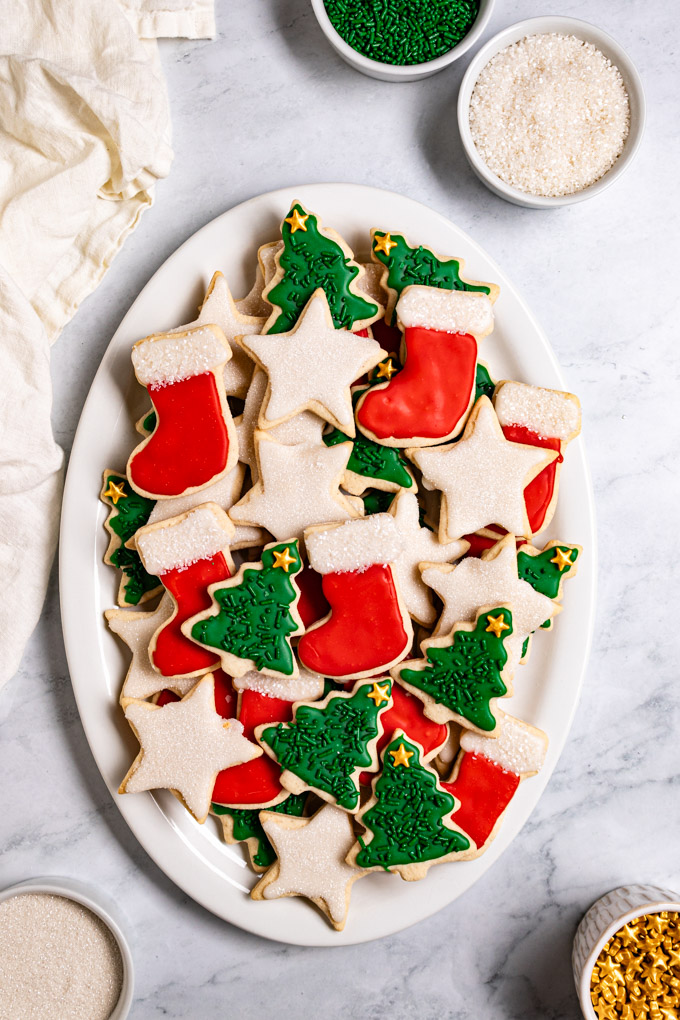
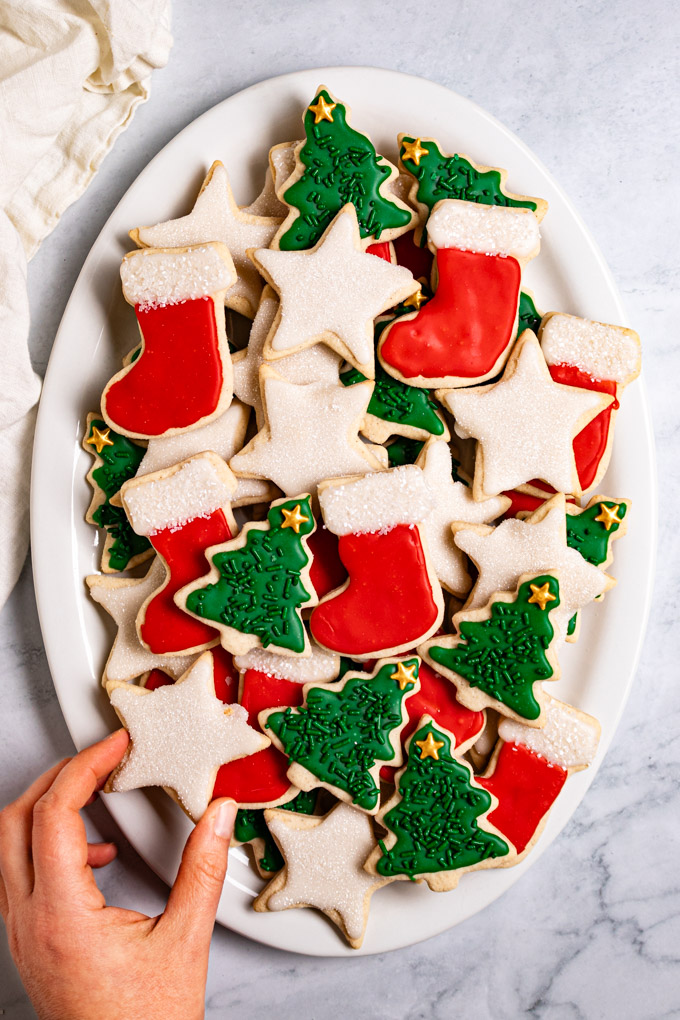
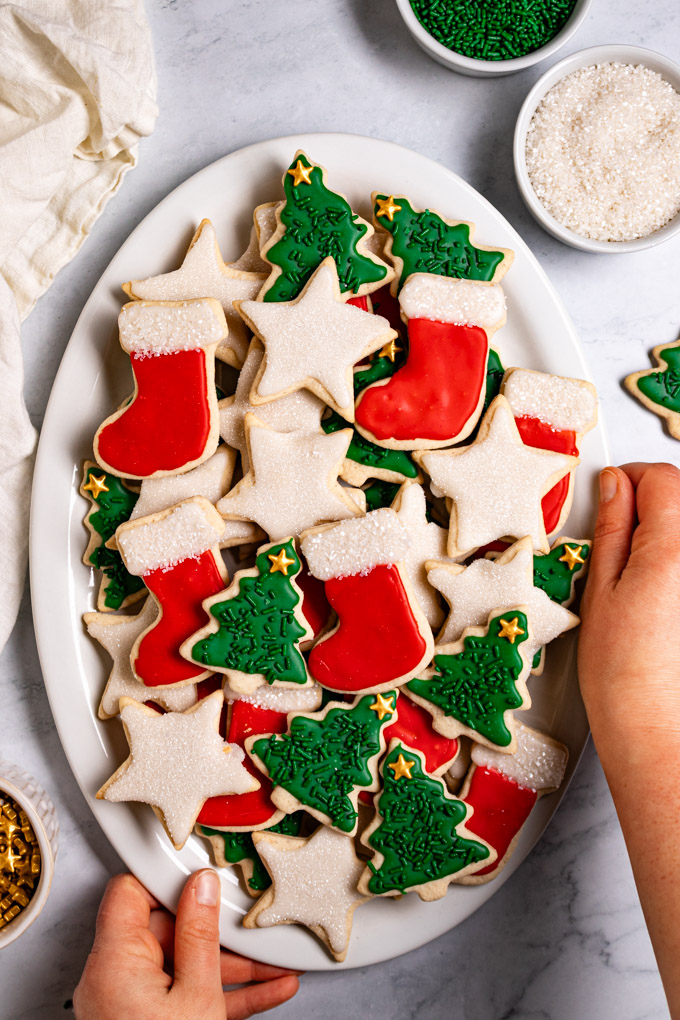
- To decorate a cookie in 2 different colors – ice one color onto the cookie, allow it to dry for 20 to 30 minutes, or until the icing is mostly dry to the touch. Then, ice the second color onto the cookie – this will ensure the colors don’t bleed together. I used this technique on my stocking cookies seen in the photos in the post.
A word of encouragement for decorating cookies – for the newbies
Decorating cookies with kids should be a fun and creative experience. Don’t stress on how your cookies look – have fun with it.
That being said, if you are decorating cookies for an event and want them to look extra nice, I encourage you to practice decorating your cookies before the event. It took me many tries to get to a place where I thought my cookies looked pretty, and not messy in a way that they were distracting for the blog photos. If you are somewhat new to using piping bags to decorate, it does take time to get used to them.
I found this video, How to Use a Decorating Bag, by Wilton to be super helpful.
Most importantly, have fun. Get creative.
You’ve got this!
Equipment & Ingredients I used to make this recipe
NOTE: I know this is quite the list of equipment, but I wanted to make sure you know everything I used so you are prepared. Of course, you don’t NEED everything on this list to make the cookies, but I did find these tools to be helpful. Of course, it also depends on what kind of icing you’re using/how you want to decorate your cookies.
- Cup4Cup multipurpose gluten free flour blend – the gluten free flour blend I tested this recipe with, and highly recommend for the best results.
- cordless hand mixer – I will never go back to one that I have to plug in, it’s so convenient.
- pastry mat – makes rolling out cookie dough even easier.
- rolling pin – I like my French rolling pin style the best.
- rimmed sheet pan – I have 2, but 3 would be useful for this recipe.
- parchment paper sheets – they’re already cut. So easy.
- cooling rack – speeds the cooling process along.
- small offset spatula – Love this little guy for transferring the cut out cookie shapes to the sheet pan.
- 12 inch piping bags – the ideal size for piping icing sugar. Keep in mind, you might want to use a bigger bag depending on what kind of icing/design you’re using.
- Wilton 4 piping tip – the perfect size for piping the details of the stars and the Christmas trees.
- Wilton 5 piping tip – the other piping tip I used for decorating.
- Gel food coloring – I love that the Americolor brand is in little squeeze bottles – makes it easy.
- scribe tools – these work great for spreading the icing over the whole cookie so that you don’t use too much icing. This is called flooding the cookie. You can also use a toothpick, but these are worth it if you’re decorating a lot of cookies.
Christmas Decorations I used
- Christmas cookie cutters – these are the 2 to 3 inch Christmas cookie cutters I used. I like that there is a variety of shapes. Feel free to use any fun shapes that coordinate with the holiday, or occasion you are making the cookies for.
- gold star sprinkles – these are the cute sprinkles that I used for the Christmas tree cookies! So fun!
Reasons you will LOVE these gluten free sugar cookie cut outs
- They’re delicious – tastier than your average sugar cookie.
- They’re festive.
- They’re versatile – Make them for Christmas, Easter, Halloween, Valentine’s Day, or any celebration.
- They’re gluten free – but they don’t taste like it!
- They’re easy to make,
- and easy to work with.
- The cookies don’t spread at all!!!
- The dough can be made in advance.
- They’re so much fun to make, and to eat!
More gluten free cookies you will love
- gluten free thin mints (Girl Scouts copycat)
- strawberry chocolate chip cookies
- coconut macaroons
- thumbprint cookies (gluten free)
- pumpkin snickerdoodle cookies
- peanut butter blossom cookies
More Christmas desserts to help you celebrate!
- gingerbread cake (gluten free option)
- three Christmas cookies, from one simple dough
- chewy gluten free molasses cookies
- date sweetened rum balls
- dark chocolate bark with candied oranges
- healthy chocolate freezer fudge
- healthier scotcharoos (without corn syrup)
- 5 minute vegan chocolate frosting
- homemade hot chocolate
- pecan pie cookies (without corn syrup)
- easy gingerbread balls (no bake)
- healthy rice krispie treats (no marshmallows)
Please leave a comment and a star rating:
If you made the recipe be sure to leave a comment along below, along with a star rating. This helps my recipes to rank higher in google, which helps them be seen by more people. Thanks!
Print
Gluten Free Sugar Cookies
- Prep Time: 30 mins
- chill time: 30 mins
- Cook Time: 12 mins (tray of cookies)
- Total Time: 1 hour 12 minutes
- Yield: 40 to 45 cookies 1x
- Category: Dessert, cookies, baking, holiday
- Method: baking
- Cuisine: gluten free, vegetarian
- Diet: Gluten Free
Description
These gluten free sugar cookies are the ultimate sugar cookie cut recipe for Christmas, Halloween, Valentine’s Day, Easter, or any celebration. The cookie dough is fool-proof and easy to work with. Plus, the cookies won’t spread while baking! No one will ever know they’re gluten free!
Ingredients
Gluten Free Sugar Cookie (Cut Outs)
- 1 1/2 cups all purpose gluten free flour blend (I highly recommend using Cup4Cup for this recipe – see notes for more info)
- 1 teaspoon baking powder
- optional: 1/2 teaspoon ground cinnamon
- optional: 1/2 teaspoon ground nutmeg (or sub cloves)
- 4 ounces (1/2 cup) unsalted butter, room temp – see notes on type of butter
- 1/2 teaspoon kosher salt – I use Morton kosher salt (If using table salt, use 1/4 teaspoon salt)
- 1/3 cup granulated sugar
- 1 large egg, room temp
- 2 teaspoons pure vanilla extract
- optional: 1/2 to 3/4 teaspoon almond extract
Dusting flour for rolling out the dough (see notes)
- 2 tablespoons white rice flour
- 2 tablespoons cornstarch
Easy Sugar Cookie Icing (optional)
- 3 cups powdered sugar, sifted
- pinch of kosher salt
- 2 tablespoons light corn syrup (see notes)
- 1/2 teaspoon pure vanilla extract
- 2 to 4 tablespoons milk of choice
- optional: gel food coloring (see notes)
Instructions
- Prepare – 2 to 3 hours before you plan to bake the cookies allow the 4 ounces unsalted butter, and 1 egg to sit out at room temp.
- Mix the dry ingredients – add the all purpose gluten free flour blend, baking powder, ground cinnamon and nutmeg (if using) to a small bowl – mix until mostly combined – it doesn’t need to be mixed together super well.
- Cream together the butter and sugar – Add the room temp butter to a large mixing bowl, use a hand mixer to cream the butter until it is nicely broken up. Then add the kosher salt and granulated sugar, and cream together until the mixture looks light and fluffy, and the butter is paler in color, about 3 minutes – scraping sides of the bowl as needed.
- Add the remaining wet ingredients – Next add the egg and mix until well combined, about 1 to 2 minutes. Then add the vanilla extract and almond extract (almond extract is optional) and mix until well combined.
- Add the dry ingredients – Add 1/3 of the dry ingredient mixture to the bowl and use the hand mixer to mix together until mostly incorporated. Add another 1/3 of the dry ingredients and mix together until incorporated. Add the remaining dry ingredients and stir the cookie dough together using a rubber spatula – it should be a cohesive, thick dough that is not super sticky to the touch. NOTE: if the dough seems a little sticky/wet, stir in another 2 to 3 tablespoons of flour until it’s the right consistency – this may be needed if you used a European style butter – see notes for more info!
- Freeze – Transfer the dough to a large piece of plastic wrap. Flatten the dough into an even disc, and wrap it tightly in the plastic wrap. Freeze for 20 to 30 minutes, or until the dough is firm, but not hard.
- Options to make the dough ahead – If making the cookie dough in advance from when you are baking it, you have two options: Option 1) Place the cookie dough in the fridge wrapped in the plastic wrap for up to one day (or overnight). Option 2) Place the plastic wrapped dough into a zipper bag and freeze for up to 6 months. When you’re ready to bake, place the dough in the fridge the day before to soften. With both of these methods, you will need to allow the dough to sit at room temp for 10 to 15 minutes longer than if you freeze it for 30 minutes and use right away.
- Preheat the oven/prepare – Arrange the oven racks so that a rack is in the center of the oven. While the dough is in the freezer (or about 15 minutes before you are ready to roll out the cookies) preheat the oven to 350 degrees Fahrenheit. Line at least 2 rimmed sheet pans with parchment paper and set aside.
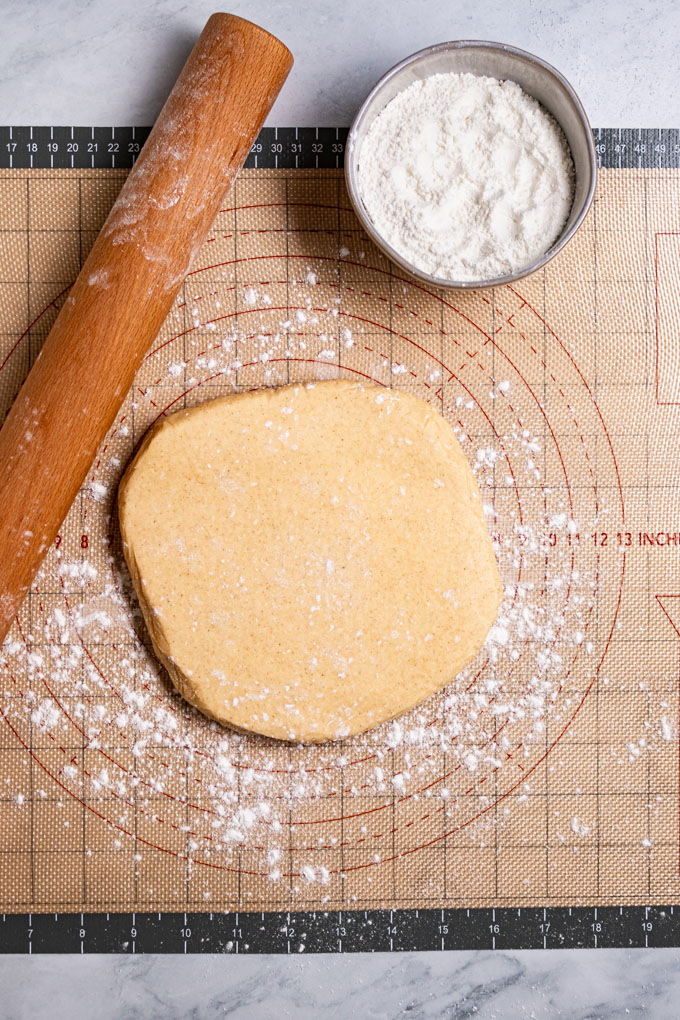
- Roll out the cookie dough – dust a clean, flat surface with the gluten free dusting flour mixture – I like to use a pastry mat. Unwrap the cookie dough and use a rolling pin to roll it out evenly, adding more dusting flour as needed to prevent sticking. Tip: I find it helpful to turn the cookie dough every 2 times I roll it out with the rolling pin, and in addition, I like to flip the cookie dough 2 to 3 times during the rolling out process. This helps to ensure nothing is sticking. You will roll out the cookie dough to about 1/4 to 1/8 inch thickness.
- Cut out the cookie shapes – Use any cookie cutters shapes you desire. You can use these cookies for any holiday, or special occasion you want. I used 2 to 3 inch cookie cutters, but you can use larger ones if you want – you may need to increase the baking time a little. Try to place the cookies close to each other to get as many cookie shapes as you can. Once all of the cookies are cut out of the dough, peel away the excess dough, and use an offset spatula that’s been dusted with flour, to transfer the cookie to a the parchment lined rimmed sheet pan. The cookies won’t spread, but you want them to be at least 1 inch apart from each other. You can re-roll the scraps of dough together to cut out more cookies. If the cookie dough gets too warm, then you can easily pop it back into the freezer for 10 minutes. I am able to re-roll my cookie dough 2 to 3 times. You should have 40 to 45 cookies when using a 2 to 3 inch cookie cutter. This depends on how thin/thick you roll out your dough, and what size of cookie cutters you use.
- Bake – Bake one tray of cookies, on the center of the oven for 10 to 12 minutes, or until the center of the cookie looks dry, and the edges are just slightly golden brown. I do recommend baking one tray of cookies at a time for the most even cooking results. However, if you want to bake 2 at the same time, swap the trays halfway through the baking time.
- Cool – Transfer the pan to a cooling rack and allow the cookies to cool for 10 minutes. After the 10 minutes, use a cookie spatula to transfer the cookies from the pan directly to the cooling rack – allow them to cool completely before eating, or decorating. NOTE: the cookies will be more delicate while they are still warm, they will become sturdy once cooled.
- Make the sugar cookie icing – NOTE: this is an optional step. See notes for more info. To a medium sized mixing bowl add the sifted powdered sugar, along with the kosher salt. Add the light corn syrup (if using), along with the vanilla extract. Start by adding 2 tablespoons of milk and whisk until combined. If dry add another 1 tablespoon of milk at a time until you reach a thick icing consistency. Here is what to look for with icing consistency: when you lift the whisk out of the icing, the icing should hold it’s shape when drizzled back and forth, for a few seconds, before it melts back into the bowl. You can also test the thickness by drizzling some icing onto a cookie and holding the cookie at an angle, if the icing stays on the cookie, and mostly holds it’s shape it’s the right consistency. If the icing is too thin then add more powdered sugar until you reach the correct consistency. If the icing is to thick, add 1 teaspoon of milk at a time until it is the correct consistency. Keep in mind that if the icing is too thick it will be hard to pipe, if it’s too thin it will run off the cookie.
- Color the icing – divide the icing into separate bowls, depending on how many colors you plan to use. Add 1 drop of gel food coloring to the icing and stir using a spoon until well combined. Add 1 or 2 more drops of food coloring until you reach your desired color. NOTE: you can mix colors to create a custom color, if you want.
- Add the icing to piping bags – Transfer the icing into small 12 inch piping bags that are fitted with small tips. I like using a either a Wilton 4 piping tip, or a Wilton 5 piping tip. It is helpful to use a drinking glass to place the piping bag into, fold the sides down, and add the icing – this helps to keep the sides of the bag clean. You can also use a ziploc bag with the corner of the bag snipped off – I have never had luck with this, so I recommend using piping bags, and tips.
- Decorate – Pipe the frosting onto the cookies in whatever desired color scheme/decoration you desire. Add sprinkles right away while the icing is still wet, if using. Tips for decorating: Outline the shape of the cookie first, then go back to fill in the rest of the cookie with more icing. Use a toothpick, or a scribe tool to “flood” the icing, which just means move the icing around so that it fills out the cookie. Add sprinkles immediately, while the icing is still wet. If wanting to use two different colors on one cookie: ice one color onto the cookie, allow it to dry for 20 to 30 minutes, or until the icing is mostly dry to the touch. Then, ice the second color onto the cookie – this will ensure the colors don’t bleed together. I used this technique on my stocking cookies seen in the photos in the post.
- Let the icing harden – allow decorated cookies to sit out, uncovered for several hours so that the icing is hardened. This way you can stack the cookies for storage without denting, or smudging the icing. You can even leave the cookies out overnight to harden.
- Store the cookies – store the cookies in an air tight container at room temp. The cookies will last for at least 5 days, maybe longer.
Notes
Gluten free flour blend – I tested this recipe using Cup4Cup multipurpose gluten free flour – this is what I recommend for this recipe. I did not test it using any other gluten free flour blend, however, from my experience, I know that you will get the best results using Cup4Cup!
Adding flavors – the cinnamon, nutmeg, and almond extract are not commonly used in a sugar cookie recipe, but we really enjoyed the extra flavor they provided. There is just a hint of each flavor, it’s not overpowering. That being said, feel free to omit all of the flavors, or only use one or two, if you prefer.
Type of butter – if using a European style butter (such as kerrygold), which has a higher content of butterfat, you may need to add an extra 2 to 3 tablespoons of flour to the dough. I think the extra fat content in the butter makes the dough a little more wet without the added flour. You don’t need to add the extra flour if using an American style butter.
Dusting flour for rolling the dough – To reserve the cup4cup for using in the cookie dough, I used a cheaper gluten free flour by using a combo of cornstarch, and white rice flour (both of which, are ingredients in cup4cup). The combo of both gives the right amount of texture and grip from the white rice, and the cornstarch provides the right amount of fine, easily spreadable fluffiness.
Sugar cookie icing is optional – This is an easy icing recipe that tastes good, is easy to make, and works well for basic decorating skills. It also hardens after it has dried so that you can stack the cookies without the icing smudging. However, if you want to use a royal icing recipe for even more decorating options, or a different recipe, feel free to. I made the sugar cookies themselves not very sweet so that they can accommodate for a super sweet icing, so keep them in mind if you decide to keep them “naked”.
Easy sugar cookie icing recipe is adapted from Sugar Spun Run. Click here to see the original recipe.
light corn syrup – I don’t normally use corn syrup at all, but in the sugar cookie icing it does help to make the icing easier to work with when decorating, it gives the icing a nice shine, and it helps the icing to dry out after a few hours so that you can stack the cookies without messing up your decoration. So, for this recipe, I do recommend using it – it’s only a small amount. NOTE: light corn syrup is not the same thing as high fructose corn syrup. However, if you want to omit the light corn syrup, you can replace it with more milk. Keep in mind that the icing won’t be as shiny, or dry out as much.
Gel food coloring – I recommend using gel food coloring when coloring your icing. If you use a non-gel food coloring that is very liquidy, you will risk thinning out the icing too much. I used Americolor gel food coloring.



that looks yummy do you have any recipes for cheesecakes?
Thank you!
Yes, I have two cheesecake recipes:
https://robustrecipes.com/no-bake-nutella-cheesecake/
https://robustrecipes.com/mini-vegan-lemon-strawberry-cheesecakes/
Let me know if you make any of them! 🙂
So glad we got to taste-test these with you. Superbly delicious, and beautiful to look at. A wonderful recipe!
Aunt momo1
Thanks
Glad to hear you enjoyed them. Thanks!
Wonderful!
Thanks!