Description
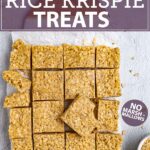
Healthy rice krispie treats are make with cashew butter and honey, instead of marshmallows for a lower-sugar option. They’re crunchy, chewy, and perfectly sweet. Best part, they’re super easy to make.
Ingredients
- 1/3 cup honey (see notes)
- 3 tablespoons coconut oil
- 1/4 teaspoon kosher salt (can omit if cashew butter is salted)
- 3/4 cup raw cashew butter (only ingredients should be raw cashews, and maybe salt) -(see notes)
- 2 teaspoons pure vanilla extract
- 2 1/2 cups crispy rice cereal (see notes, if gluten free option is needed)
- optional: 2 tablespoons chia seeds (can use white, if you have them, to blend in visually)
Instructions
- Prepare: Line a 9×9 square baking dish with parchment paper. The parchment paper is key to getting the rice krispie bars out of the pan, make sure to line all four sides, and allow for overhang so you can lift the bars out of the pan. Next, gather all of the ingredients and measure them out into separate bowls. This recipe moves really fast, so it’s important to have all of the ingredients ready to go.
- Melt the wet ingredients: To a medium sized sauce pot add the honey, coconut oil, and kosher salt (if using). Turn the heat on to medium low, and stir the ingredients just until the coconut oil melts, and the honey starts to loosen up. Add the cashew butter and stir just until the cashew butter has mixed into the honey and coconut oil, and has loosened up. You don’t want anything to simmer, make sure to stir constantly, and lower the heat if you do see any bubbles at all. Once everything is melted together, remove the pot from the heat and stir in the vanilla extract. This entire process will only take 1 to 2 minutes.
- Add the rice cereal: Quickly add the cereal into the wet ingredients, along with the chia seeds (if using). Gently mix until the cereal and chia seeds are well coated in the cashew butter mixture. Transfer the mixture to the prepared baking dish.
- Press the bars into the baking dish: Use a rubber spatula, or the bottom of a glass, to gently, but firmly, press the cereal mixture into the baking dish, making sure to get it into every corner. You want the mixture to be nice and even, and compact, so they hold together nicely.
- Freeze: Transfer the rice krispie treats to the freezer and freeze for 30 minutes, or until the bars seem nice and solid, and set.
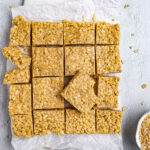
- Cut into bars: Once the rice krispie treats are set, use the parchment paper tabs to lift the treats out of the pan. Use a large, sharp knife to cut the bars into squares.
- Enjoy: Enjoy the bars immediately.
- To store: To store any leftover rice krispie treats, transfer the sliced squares to an air tight container, using parchment paper in between layers of the squares to prevent sticking. Store them in the fridge for up to 2 weeks, or in the freezer for up to 3 months. The treats are best eaten within 10 to 15 minutes out of the fridge – once they get warm they start to fall apart a little.
Notes
Options for other sweetener – I did test this recipe using agave nectar. It worked 1 out of the 3 times I made it. I had more success with the honey overall. If you want to keep this recipe vegan, you can use the agave nectar instead of honey, just keep in mind that it may not have quite the ideal chewy texture you’re expecting – it’s still good, but not as much as the ones made with honey. The ones I made using the honey held together much better, and had a more chewy texture that was very similar to a traditional rice krispie treat. I do not recommend using maple syrup, it is too watery, and will not hold the bars together.
Cashew butter – If possible use raw cashew butter, it has more of a neutral taste than roasted cashew butter does, allowing for the bars to not taste heavily of cashews, and taste more traditional. I also recommend using a cashew butter that doesn’t contain any added oils – only ingredients should be raw cashews and salt. I do have a recipe for vanilla cashew butter. You can use that recipe, and skip roasting the cashews, and omit the vanilla extract. Click here for the cashew butter recipe.
Other nut butters – I haven’t tested this exact recipe using other nut/seed butters. From making my scotcharoos, which use peanut butter, I know that other nut butters would work here. However, the cashew butter is thicker, and stickier than other nut butters, so it does hold the bars together better, more like what you expect from a traditional rice krispie bar. Also, the flavor of cashew butter is mild, and works so well at mimicking the flavor of a traditional rice krispie treat. If you try this recipe with any other nut butter, let me know in the comments how it goes.
Rice cereal – you can also use brown rice crispy cereal. However, I wouldn’t recommend using puffed rice cereal for this recipe. Puffed rice is similar, but more dense, and not what you expect from something that is meant to resemble a traditional rice krispie treats.
Gluten free option – to make gluten free scotcharoos make sure that you use gluten free cereal. Some of the cereal brands has malt in the ingredients, malt isn’t gluten free. But, there are gluten free rice cereal brands out there. Just be sure to read the label, if gluten is a concern.
Chia seeds – You can’t taste the chia seeds at all. I just added them for a little boost of nutrition. You can omit them, if you prefer.