Want to start a food blog? You have the desire to create, to share your recipes.
But you don’t know how to get started?
One step at a time. You can totally do this! And I am here to help.
I have been blogging for 6 years. I compiled all of the resources that you need to get started.
Disclaimer: Some of these links are affiliate links. Which means that if you click on one of these links and make a purchase or pay for a subscription to a program, I make a small commission, at no extra cost to you. I only share programs and brands that I have used, or are currently use, and therefore fully trust.
Getting started
First of all you need a hosting program and a domain name. The hosting service is where the files on your website live. We have used HostGator since day one.
HostGator will store the files of your website and provide secure backups of your site so that you always know that no matter might happen to the internet, your hard work will always be secure. We have had great customer service experience from HostGator and they are user friendly for beginners.
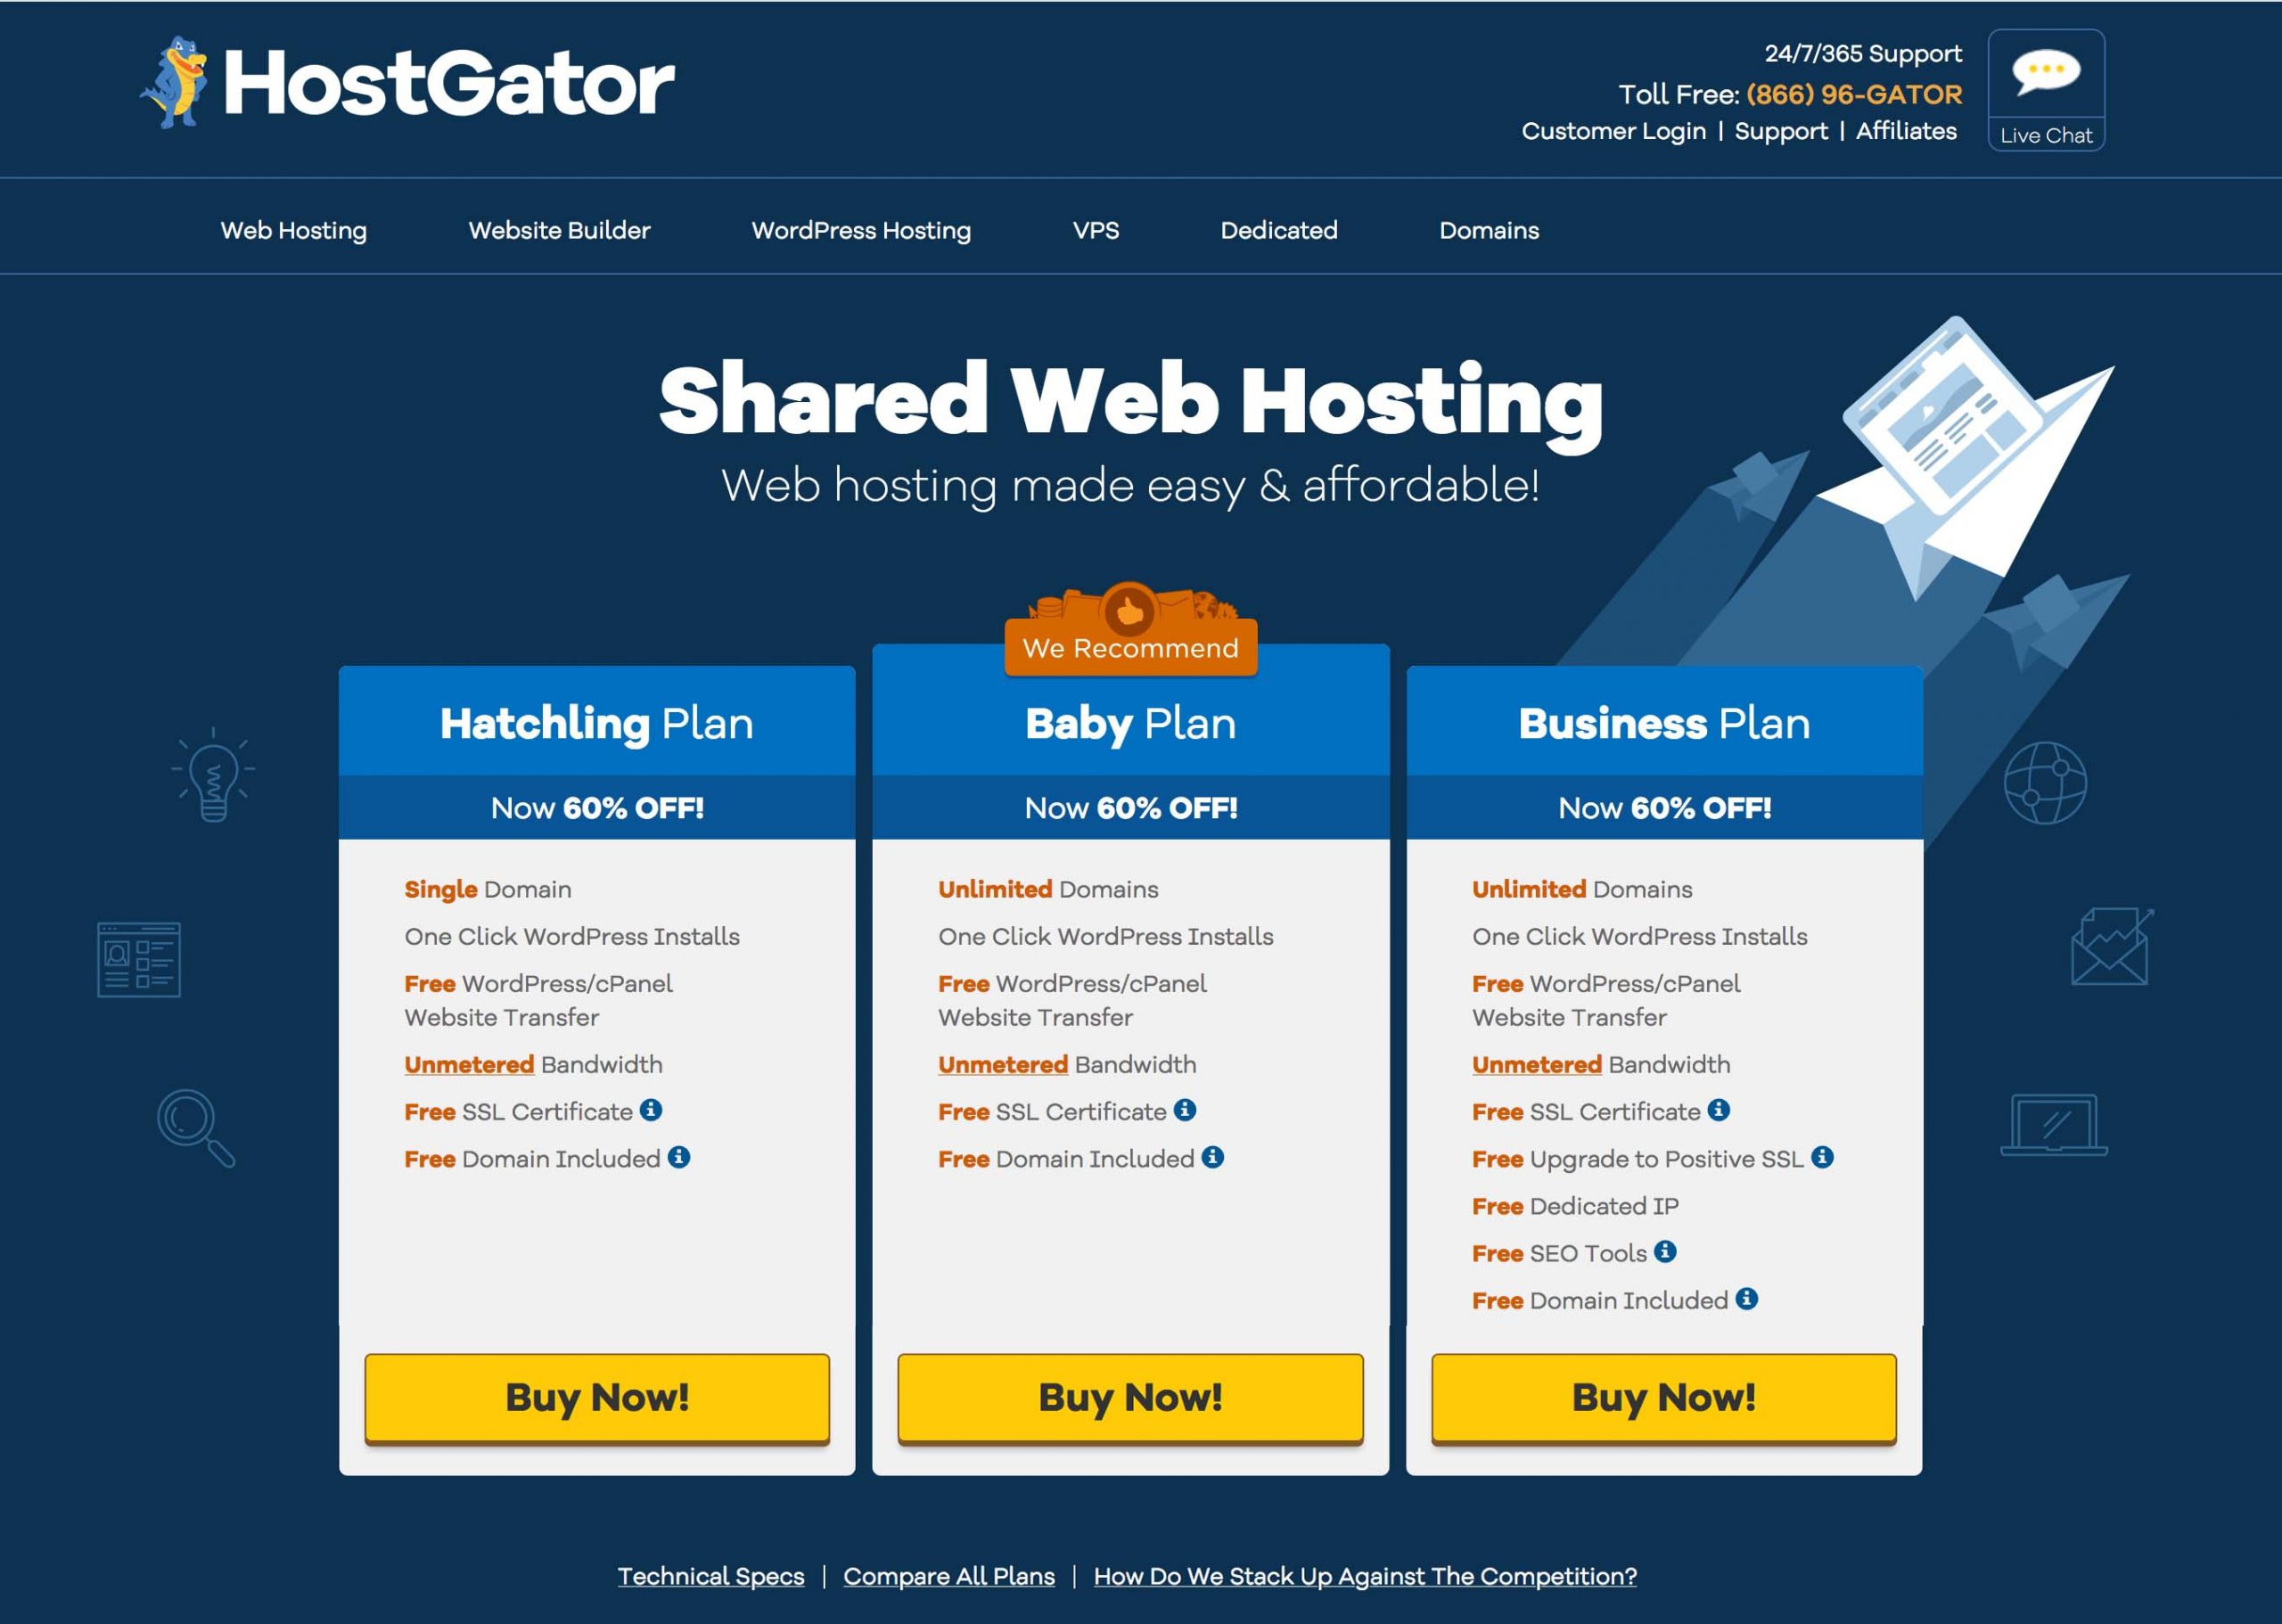
You need both a secure hosting service (to keep your files for your blog backed up), and a domain name. Choosing and purchasing a domain name for your blog is one of the first steps, if you don’t have a domain name you will have to direct people to a funky temporary URL. Once you choose your domain name you can select a hosting and domain package with HostGator. Which is nice, so that everything is in one easy payment. HostGator has 3 great plans to choose from. The most popular one is the Baby Plan, which was the first one we used.
WordPress.com: WordPress is a website builder. The place where you make all the magic happen. WordPress is the app you write your content in, share your pictures, and your recipes, it’s what makes your blog a blog. WordPress is easy to use, with so many customizable themes and plugins available you can have your website up in no time. What we love about WordPress is it’s ability to customize and create just the right blog for our needs. You can easily make your website both mobile and desktop friendly. Whether you know how to code, or not, WordPress has always been easy to work with. Plus, since it’s the number one leading website builder available, there are hundreds of resources available around the internet, for when you need help.
Customize Your Blog
Genesis Framework: The reason wordpress is so great is because of it’s easy-to-use custom themes that quickly help to make your website look professional. You can choose from a wide number of various, professional looking themes that are compatible with WordPress. My main advice is to make sure to choose a theme that is has mobile capabilities. Most people are viewing websites using mobile devices, so it’s important to have a website that works just as well on a computer as it does on a mobile device.

WordPress Plugins:
- WP Tasty Recipes – One of the most important elements to any recipe blog is the recipe index. This is where you type out the actual recipe so that it’s all nice an neat and professional looking, like you might find on any top leading food website. You might be tempted to simply write your recipe directly into the body copy of your blog post, but having a recipe index card really makes your blog more user friendly. It allows your readers to print of the recipe if they want, and even more importantly it utilizes SEO capabilities for your recipe. This means that google will be able to read the prep time, cook time, nutrition facts, etc, and feature it on the little blurb that comes up when you search for a recipe; which means more people are likely to click on it. Also, a well made recipe card will help to enable rich pins, which ties into Pinterest. Ultimately a recipe card will help your blog to be seen by more people, which is usually the goal of a food blog, right? I have been using Tasty Recipes for about a year now and it is by far the best recipe card plugin I have used. It looks great, it’s customizable, it’s user friendly when writing the recipe, and it has the best optimized SEO capabilities out there. It’s created by The people who run the amazing food blog, Pinch of Yum, and Food Blogger Pro (more to come about them later), so you know it’s going to be a good recipe card when they use it themselves.
- Yoast SEO – speaking of SEO (search engine optimization), Yoast is a necessary plugin for helping to make sure that each blog post you write has the best forms of SEO practices within each blog post. It allows you to use your select a keyword so that when people search for that particular keyword in google they will be more likely to come across your blog post. AKA using this plugin will get you more page vies. P.S. when you’re starting out, the free version works great.
Other website tools to help grow your blog
-
-
-
- Food Blogger Pro – If you are serious about wanting to turn your blog into a business that generates income, then Food Blogger Pro is hands down the number one program you need to spend your money on. Food Blogger Pro is a subscription website that teaches people how to turn a blog into a blog professional and profitable business, whether that be part time, or full time. They provide video-based courses on everything from “setting up your food blog” and a “WordPress deep dive” to “Creating Content”, courses on “Social Media”, “Generating Income”, extensive Photography Courses, food video courses, and so much more. They offer monthly live Q&A’s that you can join in on live, or watch the recording anytime you want. There are discounts with other companies and brands that they recommend. They even have a community forum where you can ask any question about blogging you may have. The community forum is where I found my Instagram commenting pod, which is how I ultimately made my food blogging friends. Food blogger Pro takes the guess work and the self research out of food blogging and makes everything accessible. It is run by food bloggers, so you know they have been where you are. I cannot recommend Food Blogger Pro enough; if you want to turn your hobby blog into a thriving business, Food Blogger Pro will 100% make that happen a lot faster and a lot easier. I only wish I had signed up from day one.

- Mailchimp – One of the best ways for people to know when you have a brand new blog post out is through an email subscription service. They can sign up to receive an email that comes straight to their inbox once your post is published. The best part is that once you set up Mailchimp, the email automatically go out to your subscribers without you having to lift a finger. Second best part, is that Mailchimp is free to use as an email marketing tool up to 2,000 subscribers.
- Tailwind – This tool might be a good one to save for once you have your number of blog posts built up, but it’s still worth mentioning. Pinterest is one of the best social media platforms to promote your recipes. It is my second largest source of traffic to my blog. Tailwind is a social media scheduling tool that helps you schedule your pins in advance, which is key to optimizing Pinterest. Tailwind has been a huge time saver for my business, and has helped to drive a lot more traffic to my blog then if I were just using Pinterest alone.

Food Photography
One of the biggest elements to a food blog are food photos. Appetizing pictures promotes people to want to click on your recipe and to ultimately make it. If you are brand new to photography and you barely know how to turn on a camera, don’t worry, I will share the best resources for learning food photography. I found the best way to learn photography is by video lessons, and good old fashion hours of practice.
If you admire other food bloggers gorgeous photos, remember that they once were where you are now. Don’t compare your beginning to someone else’s middle. Yes, admire, learn, and get inspired by others’ art, but it doesn’t help you to grow your craft by comparing.
Start where you are today. Growth is progress, not perfection.
Where to learn to take mouthwatering food photos:
- Food Blogger Pro – Yes, I already talked about them, but they have a great in-depth video, from, camera basics, to natural lighting and artificial lighting, to composition and styling, props, and how to edit your photos in Photoshop and Lightroom. Lindsay, from Pinch of Yum used to be a teacher, so you know her lessons will really help you get it down.
- The Bite Shot – Joanie is a professional food photographer and she shares awesome tips and tricks on You Tube that will help you become a better food photographer. Once I found The Bite Shot, I really noticed a huge shift from taking decent photos, professional photos that I am really proud to share.
- That’s Sage – A great webiste for food photography. She also has a You Tube channel with great videos.
- We Eat Together – Yet another great You Tube channel that focuses on food photography. Some of his videos are a little bit more advanced, but a still a great resource.
My Camera Equipment:
The best camera to start with is the one that you have. If that means your camera phone or a hand-me-down, or thirft store point & shoot camera, then learn to use that camera to the best of your ability. Start learning with whatever you can get your hands on. Don’t wait until you have that super expensive camera that everyone is talking about. Get started as soon as you have any camera in hand.
That being said, if you are looking for a beginner level DSLR that is under $1,000, this is the one that I got started with, and currently use.
- Cannon EOS Rebel T3 (Looks like they have discontinued the T3 so I have linked a T7. Pretty much any Cannon Rebel EOS version will be a good beginner camera)
- Lens: 18 to 55 mm (included in the link above)
- 50 mm lens (I don’t have this lens, but it’s recommended by every food photographer, especially as a beginner lens. It’s on my wish list).
- Extra batteries – underrated how useful it is to have extra batteries on hand. (Just make sure they fit your camera).
Photo Editing Software:
- Adobe Lightroom and Photoshop package – I use Lightroom to edit my photos and Photoshop to create pins for Pinterest by adding text. Both are really powerful tools that help me to create the best food photos I can. If you are starting out on a budget and want some free photo editing programs, this article from techradar can guide you to the right program for you. However, Adobe Lightroom and Photoshop Package is generally what is used in the food photography industry and is what will be used in any of the food photography video courses I shared. It is the most used and best Photo editing software for a reason, so if you’re wanting to make your food photos the best they can be then the Adobe package is 100% worth the investment.
Food Photography Props:
Props help to set the scene, show off your food, and tell the story you want to share in your photo. They also help to add a personalized stylized look to your photos. Knowing how to get started with food photography props can be a little daunting, I have a few tips to get you going.
- A few tips:
- you don’t have to spend a lot of money on props starting out: Use what you already have on hand, buy dishes at thrift stores, or antique stores. It takes a while to build a prop collection, but go slow and allow yourself to learn what your own personal style is. You don’t need a huge, or expensive prop collection to produce beautiful photos.
- The props don’t make the photos: Sure, props do a lot to a photo, but the most expensive plate isn’t going to make your food look better if you lighting is off, or your subject is out of focus, etc. Focus on learning how to use your camera settings in manual mode, how to manipulate your light source to get it to do what you want. Learn food styling, composition, color theory, and photo editing first; these are the things that really make your food shine. You can use the most plain bowl, on the most plain background and still make your food look fancy and beautiful if you know all of the other elements first. This is something that took me a few years to learn.
- Keep your props simple and neutral: when starting out, especially, stick to white dishes, backgrounds, backdrops, and napkins. White is easiest to learn to photograph on and in most cases makes the food look it’s best without as much effort. Stay away from really vibrant colors and patterns that may detract from the subject, which is food.
Where to buy backdrops:
Backboards, or backdrops is the surface that you place your food on. It is pretty important. Unless you have a really nice looking white table , or a marble counter top in your kitchen that happens to be near a good window, you’re gonna want some backdrops. I started out using cheap white foam core that I purchased at the craft store. This is a great option when starting out. There are also great ways to make an inexpensive backdrop yourself. I love this video from The Bite Shot.
- Ink and Elm Vinyl backdrops – relatively inexpensive vinyl backdrops are a great option. I have been using some for several years and I love them. They are easy to store, lite weight, stain resistant, easy to clean, and look like the real deal. My two favorites are “grunge storm” and “smooth marble”. I get them in the 3ft x 2ft size.
Where to buy plates, glasses, bowls, forks, and other props:
I have been collecting my props for years, so I have gathered them from all over the place. I am always keeping my eyes peeled for good finds. Once you learn what your style and vibe is it’s easy to know if a piece is right for you, but starting out you may need to allow room to experiment. I keep a pretty modest sized prop collection and use a lot of simple pieces, primarily neutrals. Obviously, this isn’t the only option to make food look great, it’s just my personal style, and what I recommend when getting started with food photography.
- Thrift stores
- antique stores – especially good for antique looking cutlery that has a dull finish, which is ideal for reducing unwanted shine and reflection in photos.
- Target
- World Market
- Crate and Barrel
- Ebay
- Pottery from Etsy (or other uniquely crafted dishes)
- Magic Linen – Linen napkins and towels create the best texture.
Bookkeeping/Business Tools for Blogging
If you plan to turn your blog into a business, it’s never too early to start using an online software program to keep track of your expenses. Keeping track of your income and expenses is a super important part of owning your own business.
-
-

-
- Freshbooks – I highly recommend using Freshbooks for keeping track of your receipts, income, expenses, for sending out invoices, and for doing taxes. When I started my business I dreaded spending time bookkeeping. I used to let receipts pile up on my desk because I procrastinated dealing with them. I started using Freshbooks a few years ago and it has saved me so much time doing something I don’t normally enjoy. Freshbooks is super user friendly for non-accountants like myself. It’s easy to use and honestly makes bookkeeping way more enjoyable and less daunting. The best part, during tax season you just need to print off one page to send in with the other tax forms. It has allowed me to spend more time doing the things that I love.
- VistaPrint for business Cards – Not super essential when you’re starting out, but they are great to have on hand if you are going to any food blogging conventions, or have other times when handing out a business card is useful. I have used VistaPrint to create good quality, impressive business cards on a budget.
Alright friends, I know that’s a lot of information, but feel free to read it in chunks and come back whenever you need. I plan to update this page as I continue to grow my business and have more resources to share with you.
Words of encouragement: You can totally do this. The hardest part is taking that first step and getting started on your blog, but if you’re committed you can build something beautiful, that puts light and joy into the world. Every castle is built brick by brick.
You’ve got this! I believe in you.
Sending you all the encouraging vibes,
Much love,
Emily