Description
Gluten free carrot cake with cream cheese frosting is studded with carrots, raisins, pineapple, and laced with warming spices. The perfect cake for parties and holiday celebrations.
Ingredients
- Cake
- 1 1/2 cups + 1 tablespoon carrots, finely shredded – about 3 to 4 large carrots (see notes)
- 1 1/2 cups + 2 tablespoons all purpose gluten free flour blend (I used Bob’s Red Mill Gluten Free 1 to 1 Baking Flour)
- 1 1/2 cups + 1 tablespoon blanched almond flour (not almond meal)
- 1/2 teaspoon salt
- 1 teaspoon baking powder
- 1/2 teaspoon baking soda
- 1 tablespoon + 1 teaspoon cinnamon
- 1 teaspoon ground ginger
- 1/4 teaspoon ground allspice
- 1/4 teaspoon nutmeg
- 3 eggs, room temp
- 1/2 cup + 1 tablespoon coconut sugar
- 1/3 cup coconut oil, melted
- 3/4 cup pure maple syrup or honey
- 3/4 cup unsweetened applesauce
- 3/4 cup + 1 tablespoon canned crushed pineapple, drained
- 2 teaspoons pure vanilla extract
- 1 3/4 cup milk (I used unsweetened almond milk, but any kind will work)
- optional: 2/3 cup golden raisins (can swap for chopped walnuts or pecans, if you prefer)
- Frosting Options (see notes)
- Cream cheese frosting without powdered sugar(click here for the recipe)
- Vegan cashew frosting – dairy free option that resembles buttercream frosting (click here for the recipe)
- yogurt cream cheese frosting – a slightly lighter version of traditional cream cheese frosting. (click here for the recipe)
- Topping/decoration
- Optional: 1/4 cup chopped pecans or walnuts
Instructions
- Prepare: Position your oven rack in the middle of your oven. Preheat your oven to 350 degrees Fahrenheit. Grease two round 9 inch cake pans or three 8 inch cake pans, set aside. At this time also grate your carrots so that they are ready to go.
- Mix the dry ingredients: To a large mixing bowl add the gluten free flour blend, almond flour, salt, baking powder, baking soda, cinnamon, ginger, allspice, and nutmeg – whisk to combine and set aside.
- Mix the wet ingredients: To a medium sized mixing bowl add the eggs and coconut sugar, whisk until well combined. Add the coconut oil, maple syrup, applesauce, crushed and drained pineapple, vanilla, and milk – whisk until everything is well combined.
- Combine the wet and dry ingredients: Transfer the wet ingredients to the bowl with the dry ingredients, use a spatula to gently stir until everything is well combined. Fold in your grated carrots and raisins (if using). The batter should be thick but slightly runny. If it seems too runny add 1 or 2 more tablespoons of GF all purpose flour. Evenly divide the batter between the cake pans. Tap the pans on the counter a few times to release any air bubbles.
- Bake: Transfer the cake pans to the middle rack of the preheated oven. Bake for 25 to 30 minutes, or until the top of the cake is firm and a toothpick removes mostly clean from the center.
- Cool: Cool the cakes completely (about 1 hour) on a wire rack. To remove the cakes gently run a butter knife around the sides and then flip the cake out onto a plate or your hand to catch it.
- Make the frosting: While your cakes are cooling make your frosting (about 10 to 20 minutes of time, depending on if you make cream cheese frosting or vegan cashew frosting) – links to recipes above.
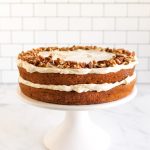
- Frost the cake: Once the cakes have completely cooled place a teaspoon of the frosting on the center of your cake stand or serving platter to hold the cake in place. Carefully transfer one cake to the center of the cake stand/platter, placing the cake upside down. Use an offset spatula to spread half of the frosting on the cake, right to the edges so some will show when you put the second cake layer on top. Transfer the second cake on top of the first cake, placing it upside down. Spread the remaining frosting on top of the cake, right to the edges. Use the spatula to smooth the frosting out. Sprinkle the chopped nuts around the edge of the cake, if desired.
- Chill the cake: Cover and chill the cake for at least 3 hours, or overnight. You can eat the cake right away, but it is way better chilled. Store covered in the fridge for up to 1 week.
Notes
carrots: I highly recommend finely grating your carrots using the medium size grater on a box grater. This does take a little more elbow grease, so if you are in a hurry you can use the largest grater you would normally use to grate carrots. BUT I tested the cake with both sizes of grated carrots and the finely grated carrots melted into the cake better and gave the cake a more “carroty”, sweet flavor that made a difference.
Frosting: I tested this cake with both thecream cheese frostingrecipe and the vegan cashew frosting recipe. We preferred the cream cheese frosting for a more authentic taste. However, if you are wanting to keep this cake dairy free than the vegan cashew frosting is a good option and very delish. Just keep in mind you will need to add 20 minutes of time versus 10 minutes for the cream cheese frosting.
Prep time doesn’t reflect time needed to make the frosting, since it varies depending on the type of frosting you will make. Add 10 to 20 minutes on to your overall prep time.
Decorating: I chose to frost my cake in a naked style (only frosting the middle and top, but not the sides). The amount of frosting was perfect for this style. If you want to frost the sides than I would recommend increasing the frosting recipe by half or even doubling it depending on how much you will use. It’s always better to have extra frosting than not enough ;).