Description
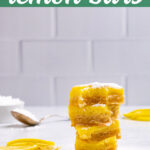
Gluten free lemon bars are the perfect balance of tart, and sweet. They have a soft, buttery crust with a thick, zingy lemon topping. They’re great for parties, or Holidays during the winter, spring, and summer.
Ingredients
Crust
- 1/4 cup unsalted butter, room temp (half of a stick)
- 1/3 cup granulated sugar (see notes)
- 1/4 teaspoon kosher salt (if using table salt, reduce to 1/8 teaspoon)
- 1 egg white, room temp (reserve the egg yolk)
- 1 cup blanched almond flour
- 1/4 cup tapioca flour/starch
- 1/4 cup coconut flour
Lemon Filling
- zest of 3 to 4 lemons ( about 1 tablespoon of zest)
- 1/2 cup granulated sugar (See notes for refined-sugar-free option)
- 1/4 teaspoon kosher salt (if using table salt, reduce to a pinch)
- 4 whole eggs, room temp
- 1 egg yolk (that was reserved from making the crust)
- 1/2 cup fresh squeezed lemon juice (about 2 to 3 lemons)
- 2 tablespoons tapioca flour/starch
Optional topping
- powdered sugar, for dusting over the lemon bars, if desired.
Instructions
- Prepare – 2 hours before you’re going to bake place your butter and eggs on the counter so they can come to room temperature. Line an 8×8 ceramic baking dish with parchment paper (sides included. See notes for a video tutorial). Arrange your oven racks to have one of the racks in the center of the oven, if not already. Preheat your oven to 350 degrees Fahrenheit.
- Make the crust – Add the room temp butter, 1/3 cup granulated sugar, and 1/4 teaspoon kosher salt to a large mixing bowl. Use hand mixer to cream the sugar, butter, and salt together until it is fluffy. Add the egg white, and use the hand mixer to combine the ingredients together. Note: the egg white and butter will separate and look kind of gross, that’s okay, it will all come together once the flour is added. Next, add the flours to the bowl, the blanched almond flour, tapioca flour, and coconut flour – start the hand mixer on low, and then increase it to a higher speed as the flour is incorporated. Once the dough is mostly mixed, turn off the hand mixer, and use a spatula to make sure all the flour is incorporated. It should be a nice thick, dough that resembles a sugar cookie dough. NOTE: The dough shouldn’t be super sticky, but if it is, give it 5 minutes for the coconut flour to absorb any excess liquid.
- Press the crust into the baking dish – Transfer the dough into the parchment-lined-baking dish by adding chunks of the dough to the baking dish so that each area of the baking dish as some dough. Use your fingers, or a spatula to press the dough into the pan. Then, use the bottom of a drinking glass, or measuring cup, along with a small square of parchment paper to prevent sticking, to evenly press dough into the baking dish, making sure to get the corners, and edges nice and even too.
- Bake the crust – Bake the crust on the center rack of the oven for 25 to 30 minutes, or until the edges begin to turn golden brown, and the center is dry to the touch.
- Make the lemon filling – while the crust is baking, make the lemon filling. First, wash, and dry the beaters of your hand mixer, because they will be used again. Then, use a microplane to zest the lemons into a medium sized mixing bowl until you have about 1 tablespoon of lemon zest. Add the 1/2 cup of granulated sugar, and the 1/4 teaspoon kosher salt, to the bowl with the lemon zest and use your clean fingers to massage the lemon zest into the sugar until the sugar looks like the texture of wet sand, and has turned a pail yellow color. NOTE: don’t skip this step, it helps to release the oils in the lemon zest to create an extra delicious lemon bar. Trust me, it’s worth it. Then, add the 4 whole eggs, plus, the 1 egg yolk that was reserved from earlier – use your hand mixer to beat the eggs with the sugar until the sugar is fully dissolved, and no streaks show in the eggs. Set aside.
- Juice the lemons – Juice just over a 1/2 cup of lemon juice either using a handheld lemon lime juicer, or an electric citrus juicer (my preferred method for this recipe), to juice the lemons. Use a small fine mesh siv to strain out any pulp, or seeds from the juice. Be sure to measure the juice again after straining it to ensure you have a 1/2 cup of juice.
- Make the slurry – Add the 2 tablespoons of tapioca flour to a small bowl. Then, add 3 to 4 tablespoons of the lemon juice to the tapioca flour, use a fork to whisk the two together until there are no more lumps.
- Finish the lemon filling – Add the slurry mixture and the remaining lemon juice into the bowl with the eggs and sugar. Use your hand mixer to beat on low to combine really well to ensure there are no lumps from the tapioca flour. Set aside until the crust is done baking.
- Add the lemon filling to the crust – Once the crust is done baking (it should be golden brown on the edges, and firm to the touch in the center), remove the crust from the oven and reduce the oven temp to 325 degrees Fahrenheit. Carefully poor the lemon filling on top of the crust, being sure to scrape out the bowl.
- Bake the lemon bars with the lemon filling – Carefully transfer the lemon bars back to the oven and bake for 15 to 17 minutes, or until the edges are set, and the center is slightly jiggly when you give the pan a gently shake. If it needs a little more time, I suggest checking it every minute until it’s done.
- Cool – Once the lemon bars are done baking, allow them to cool on wire rack. It will take several hours for them to cool completely.
- Chill – Once the lemon bars are fully cooled, cover the pan with plastic wrap and transfer it to the fridge to chill for a minimum of 4 hours, but 8 hours, or more is best. The lemon bars not only taste best when chilled, but they hold their shape best when chilled too. So, this is a great make-ahead dessert.
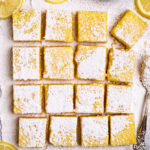
- Cut the lemon bars – once the lemon bars are chilled, and you’re ready to serve them, carefully lift the bars out of the pan using the edges of the parchment paper, and place the bars on a cutting board. Use a sharp chef’s knife to cut the bars into even squares. TIP: If you want the bars to look extra nice then I recommend cutting off a thin edge around each edge of the bars to create and extra pretty looking edge (especially if the parchment paper made the bars kind of “wavy”). Another tip, is to wipe the knife off with a damp paper towel between each cut – this will give the lemon bars a super clean looking cut. This isn’t super necessary, but if you’re serving the lemon bars at a party or something, it’s a nice touch.
- Serve – Make sure to serve the lemon bars chilled, straight from the fridge, for the best texture. You can serve the lemon bars as is. Or, you can use a fine mesh siv to dust some powdered sugar over the top. This is traditional with lemon bars, however, I don’t find it to be necessary when I am just eating them myself. Keep in mind the powdered sugar will melt due to the moisture on the lemon bars, so you will want to do this step just before serving. Note: you can cut them up ahead of time an store them in an air tight container in the fridge until you are ready to serve.


Notes
Baking Dish I used – I used this ceramic 8×8 baking dish. When I tried to use an 8×8 metal baking dish, the lemon filling spread everywhere for some reason. I recommend using this baking dish, or a similar ceramic 8×8 baking dish.
Parchment paper video tutorial – These bars love to stick, so be sure to use parchment paper to line the bottom of, and sides of your baking pan. Here is a tuitional on an easy method – how to line a baking pan
refined sugar free option – To make this recipe refined-sugar-free, you can swap the granulated sugar in the crust for 1/3 cup coconut sugar. And, you can swap the granulated sugar in the lemon filling, for 1/2 cup honey. If using the honey, you will need to cook the bars for 16 to 20 minutes.
Note about refined sugar free option given above – Although the the option given above still made a very delicious lemon bar, we much preferred the recipe as I wrote it. The lemon bars using the granulated sugar have a much more bright, clean, zippy, lemon flavor to them with a tender, sugar-cookie-like crust. The refined sugar free version, was still very good, and worth making, just not our absolute favorite.
Dairy Free option – You could swap the butter for vegan butter.
How to store the lemon bars – Store the cut lemon bars in an air tight container, without stacking them. If you’re not concerned about how they will look, you can store another layer of lemon bars on top with parchment paper in between. They will keep for up to 5 days.