Description
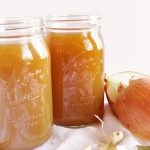
Bone broth is immune boosting and rich in minerals and collagen.Sip on it from a mug or use it to make soup or cook grains in. It only takes 2 hours to cook in the instant pot!
Ingredients
- 1 to 2 pounds of chicken, turkey, or beef bones* (organic and free range when possible)
- 2 tablespoons apple cider vinegar**
- 1 teaspoon salt
- 1 onion, peeled and roughly chopped
- 1 carrot, roughly chopped
- 2 celery stalks, roughly chopped (or use leftover celery tops)
- 4 cloves garlic
- 1 teaspoon peppercorns
- 1 to 2 bay leaves
- A few sprigs of parsley (other herbs could be thyme or rosemary for a different flavor)
- 4 to 6 cups filtered water
Instructions
- Prepare: To a 6 quart instant pot/pressure cooker (or larger) add all of the ingredients. Fill with the water so that it barely covers the bones – the bones will sort of melt into the liquid as it cooks (the less water you use the richer in flavor the broth will be).
- Set Instant pot: Lock the lid onto your instant pot. Set the valve to sealing. Press the soup button and add 2 hours to the time. Once done use a quick release. Allow the broth to cool enough to handle.
- Strain: Remove the large bones and discard. Pour the broth through a fine mesh siv to get any other small bones/veggies, discard. Allow the broth to mostly cool and then cover and place in the fridge for 6 hours.
- Scoop off fat: Once the broth has fully chilled any fat in the broth will solidify on the surface. Use a spoon to skim it off and discard. Transfer the broth to jars or other containers. Keep in the fridge for up to 1 week or freeze for up to 6 months. Note: it may continue to get a little more gelatinous as it chills for another 24 hours.
- How to use: Of course you can use your broth to make soups, cook your grains in, or anything else you normally would use broth for. Keep in mind that when making a soup using this the broth will be a very rich, strong flavor. IMO a brothy soup such as chicken noodle or my slow cooker chicken and wild rice soup, would be best to allow the flavor of the broth to shine. My favorite way to enjoy this rich, nutritious broth is to heat it up in a mug along with 1 garlic clove, micro planed, a good amount of salt to taste and sometimes a pinch of cayenne pepper. I sip it straight from the mug. Super comforting and healthy. Great during the winter or whenever you’re sick or under the weather.
Notes
*Where to get your bones: 1) Save bones from your own cooking in the freezer until you are ready to use them. So far I have used a chicken carcass from roasting my own chicken and turkey bones leftover from Thanksgiving 2) You can ask your butcher if they will sell you bones – this would be a good place to try to get good beef bones (especially if you don’t make beef a lot). 3) Local farmer’s markets often times sell meat in bulk, you can try asking them for bones.
Other parts to consider adding in for nutrition and extra collagen, if you can get your hands on them: chicken feet (I know, kind of gross, but apparently they have a lot of collagen in them). Knuckles, and neck bones help too. I had the best results when I had a turkey neck bone!
**Apple cider vinegar and the salt help to pull the minerals and nutrients out of the bones. The vinegar boils off, you won’t taste it all, so don’t skip this ingredient :).
For the remainder of the veggies: Use what you have on hand or prefer. What you use will change the flavor of the broth. I think the necessities are the onion, garlic, celery, and peppercorns
Slow cooker instructions: Follow the same instructions for the instant pot. Cook on low for 12 to 48 hours. Add more water if needed, the water will reduce unlike when using the Instant pot.
Resources and recipe adapted from The Kitchen