Description
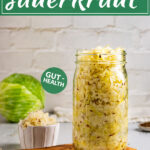
Your guide for how to make sauerkraut. It only requires two ingredients, and is easy to make. It’s tangy, salty, crunchy, and packed with gut-healthy probiotics. Add it to brats, sandwiches, salads, or eat it plain. It’s so good!
Ingredients
- 1 medium head of cabbage – about 3 pounds (either green, or red cabbage work. Green is most common)
- 1 tablespoon kosher salt, or pickling salt (DO NOT USE TABLE SALT – see notes)
- optional: 1 tablespoon caraway seeds
Instructions
- Shred the cabbage: Remove a few of the outer leaves of the cabbage, making sure all bruised, or damaged leaves are removed. Using a Chef’s knife slice the cabbage in half and remove the core. Shred your cabbage by either using a mandolin (my preferred method) or the slicing blade of a food processor – (the fastest way). Or, you can simply use a chef’s knife, and cut the cabbage into thin shreds. Transfer the shredded cabbage to a large mixing bowl.
- Massage the cabbage: Add the 1 tablespoon kosher, or pickling salt to the shredded cabbage and use clean hands to massage the cabbage until the salt has dissolved and the cabbage has reduced in size, and has released a good amount of liquid – massage for at least 5 minutes. Yes, it’s a good arm workout.
- Allow the cabbage to rest: At this point it is helpful to allow the cabbage to rest for 20 to 30 minutes – the salt will continue to draw the liquid out of the cabbage and you will find a lot of liquid at the bottom of the bowl.
- Prepare your canning jar: While the cabbage is resting, wash your canning jar and lid, and jelly jar – no need to sanitize. NOTE: I don’t usually wash my canning jars right before using them, but it’s a good practice to check them out just in case they are dusty, or haven’t been washed in a while.
- Massage cabbage again: Returning to the cabbage give it another massage for another 5 minutes. At this point, the cabbage will have released a lot of liquid, and will have reduced in size by over half.
- Add flavors: optional step: If using caraway seeds toss them into the cabbage at this point.
- Stuff cabbage into canning jar: Transfer the cabbage into the canning jar (DO NOT DISCARD ANY LIQUID) – use the back of a wooden spoon a muddler to help you pack it in tight, it should all fit with about 2 to 3 inches of head space, if it doesn’t you need to massage the cabbage more to help it break down. Pour some (or all) of the left behind liquid just so that the cabbage is submerged in liquid.
- Add the jelly jar + lid: Next place the jelly jar (without a lid on the jelly jar) – this acts as a weight to keep everything submerged – use a damp paper towel to wipe off any straggler cabbage pieces that aren’t underneath the liquid. Place the jar underneath a baking dish, or food storage container that has sides, to catch any spills. Screw the canning jar lid onto the 32 ounce wide mouth jar – some liquid may come out of the jar, this is okay as long as there is still liquid covering the cabbage. Slightly unscrew the canning jar lid so that it is secured but not on tight – this allows any gasses to escape from the jar. NOTE: It’s very important to make sure no pieces of cabbage remain above the liquid, otherwise it will mold.
- Ferment: Place the jar in a bowl or container to catch any overflow. Find a good fermentation location. Ideal place is 64 to 74 degrees Fahrenheit and not in direct sunlight. My ideal location is in the pantry in our kitchen, with the doors closed. In my old house, I kept in in the basement during the summer, because it kept the sauerkraut cool. You want to allow the sauerkraut to ferment for at least 3 to 4 days or up to 1 to 2 weeks – this varies depending on the temperature of your fermentation location and how tangy you personally like the kraut to be. The cooler the temperature, the longer it will take to ferment. The warmer the temperature, the faster it will ferment.
- Check on your sauerkraut: You will want to check on your sauerkraut daily in the first few days. This is what you want to look for: 1) check to make sure the liquid line hasn’t creeped down past the cabbage. If this has happened then you want to mix 1 tablespoon kosher salt to 2 cups of water and use this mixture to top off the cabbage so that it’s submerged again (you will not need to use all of this mixture). 2) check the lid to make sure it’s loose – if the lid isn’t loose the gasses can build up and make the jar explode.
- Signs of fermentation: 1) you see bubbles in the cabbage. 2) the cabbage begins to turn from a bright green to a less bright green and eventually to a tan/very mild green (what you see when you think of sauerkraut).
- Taste your sauerkraut: As stated before how long you want your sauerkraut to ferment depends on temperature of location and your personal preference of how tangy it is. I like mine really tangy so I generally allow it to ferment for 1 week – I might even go as long as 2 weeks in the winter when the temperature is cooler – warmer temperatures means the fermentation process goes faster. You can start eating the sauerkraut after 3 to 4 days. I suggest you start tasting it at 3 to 4 days and see how you like it and after that taste it every week. Be sure to use a clean fork so you don’t contaminate it. You will know it’s done when it’s tangy and the color of the cabbage has changed to tan/very mild green.
- Store: Once your cabbage has finished fermenting and you’re ready to eat it remove the jelly jar and screw the canning jar lid on tight. Store it in the fridge for 1 to 2 months, even longer. Enjoy eating by itself or on sandwiches, salads, burgers, pretty much anything. NOTE: the sauerkraut will continue to ferment slowly while it’s in the fridge. It’s still okay to eat, just keep in mind that it will continue to get more sour over a longer period of time, even in the fridge.
Notes
Type of Salt – The type of salt you use if very important for this recipe. DO NOT USE TABLE SALT. Table salt contains iodine which will prevent the cabbage from fermenting. Don’t use sea salt either, the minerals can also prevent fermentation. You want to use either kosher salt, or pickling salt – I have used both, and both of them works great.
Parchment paper – In the original recipe I instructed you to cut a circle of parchment paper to fit inside the canning jar. I did this to prevent any tiny pieces of cabbage from floating up past the brine. When I shred my cabbage using a mandolin (my preferred method), I don’t get tiny pieces of cabbage, so I don’t have this issue with the tiny pieces floating up. If you do have tiny pieces of shredded cabbage, which might occur if you shred the cabbage using the slicing blade of a food processor, then you still may want to use the parchment paper. Simply, place the circle of parchment paper underneath the jelly jar. Remove the parchment paper before storing the sauerkraut in the fridge. I have seen a lot of people use a piece of cabbage leaf to do this, that’s an option as well. I still recommend using the jelly jar as a weight to keep everything packed in tightly under the brine.
Can I use pre-shredded cabbage? – No. Pre-shredded cabbage, like what you buy in a bag, for coleslaw mix, will not ferment.
Signs your sauerkraut fermentation went wrong – if you see any kind of mold, green black, or white – discard the sauerkraut and start over. – If the sauerkraut smells off or tastes bad. Yes, it should have that fermented taste and smell but use your good judgement don’t eat it if it’s not smelling good. NOTE: If you see white foam or bubbles on the top that’s usually okay, just use a spoon to scrape it off.


