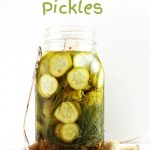
Description
Making homemade pickles is really simple; no canning involved with this recipe. The hardest part is allowing them to pickle in the refrigerator for 3 days without eating them.
Ingredients
Units
Scale
- 1 1/4 cups white wine vinegar
- 3/4 cup filtered water
- 1 tablespoon plus 1 teaspoon salt
- 4 to 5 sprigs fresh dill
- 4 cloves garlic, minced
- 1 teaspoon red pepper flakes (this is what adds the heat; adjust to taste or eliminate if you don’t want any heat)
- 1/2 teaspoon black peppercorns
- 1 large cucumber, cut into slices or spears (I actually used 4 mini seedless cucumbers, but any type of cucumber would work)
Instructions
- In a small sauce pot heat the white wine vinegar, filtered water, and salt until it reaches a boil. Immediately turn off the heat. Allow to cool for 5 to 10 minutes.
- While the brine mixture is cooling prepare your pickle jar. Using a clean 24 ounce glass jar, stuff in the dill, garlic, red pepper flakes, black peppercorns, and cucumber. Pack everything in tightly. Pour the brine liquid that has been cooling into the jar. If any cucumbers are poking through the liquid then add a little water to cover the pickles completely.
- Allow the jar with its contents to cool to room temperature on your counter. Place it in the refrigerator for at least 3 days to allow the ingredients to pickle. Once pickled, store the pickles in the refrigerator for 3 to 4 weeks.
Notes
Prep or cook time does not include the 3 days of inactive time that the pickles are pickling in the refrigerator.
Recipe adapted from Clean and Delicious.com


