Description
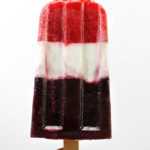
Vegan Red, White and Blue Popsicles are a delicious, festive, summertime treat that are perfect for the 4th of July – or anytime during the summer. They have layers of pureed strawberry, full fat coconut milk, and pureed blueberry.
Ingredients
- FOR THE RED LAYER:
- 1 1/2 cups frozen, defrosted strawberries
- 2 to 3 teaspoons agave nectar (depending on how sweet your strawberries are)
- 1 teaspoon gluten free vodka* (suggestion on a brand in notes section below)
- FOR THE WHITE LAYER:
- 1 1/2 cups canned full fat coconut milk, shaken
- 1 teaspoon pure vanilla extract
- 1 teaspoon gluten free vodka
- 2 to 3 teaspoons agave nectar
- FOR THE BLUE LAYER:
- 2 cups frozen blueberries, defrosted
- 1 teaspoon gluten free vodka
Instructions
- FOR THE RED LAYER:
- Blend the strawberries in the blender for 1 minute, or until smooth. Taste and add agave nectar to desired amount depending on the sweetness of your fruit. Also add the vodka and blend until combined.
- Pour the strawberry puree into your popsicle molds, about 1/3 of the way full. Pop the popsicle mold into the freezer for 30 minutes. This helps to ensure that the layers don’t mix together.
- FOR THE WHITE LAYER:
- Rinse out your blender; no need to wash it. Add the coconut milk, vanilla extract, vodka and agave nectar to the blender. Blend until well mixed, about 10 seconds. Don’t overblend; otherwise you might create whipped coconut cream.
- Once the red layer has partially frozen remove the mold and evenly distribute the coconut milk in each mold, about 1/3 of the way up.
- Pop the mold back into the freezer for another 30 minutes.
- FOR THE BLUE LAYER:
- Again rinse out the blender; no need to wash it. To the blender add the blueberries and vodka. Blend on high for 10 seconds, or until smooth and no skins remain. I found the blueberries to be sweet enough so I didn’t add any agave nectar, but taste and adjust if needed.
- Once the white layer has partially frozen evenly distribute the blueberry puree into each mold filling it up mostly to the top. Leave a little room for expansion.
- Insert your popsicle molds and freeze for 4 to 6 hours, or until completely frozen.
- Once the popsicles are frozen fill your sink with hot water and gently lower the popsicles into the hot water. Do not allow the top of the popsicles to be covered with the water. Allow them to sit for 15 to 30 seconds, or until the popsicles remove from the mold.
- Serve immediately or store in the fridge well covered for up to 2 months.
Notes
*I added a teaspoon of vodka to each layer to prevent the popsicles from having so many ice crystals and help them to be a little smoother. You cannot taste the vodka at all. If you don’t want to serve vodka to your kids that’s okay, you can leave it out; just know that the texture will vary slightly.
Not all vodka is gluten free. Those distilled from potatoes, or from corn, such as Tito’s, are gluten free.
This is the popsicle mold I used, although any kind will do. Or you can use ice cube trays with mini popsicle sticks or even small paper cups!
You may have some of the layers leftover depending on the size of your molds. You can either add them each to a smoothie, maybe make them into a cocktail, or make them into more popsicles.
The prep time does not include the time needed to freeze the popsicles, 5 to 7 hours total.